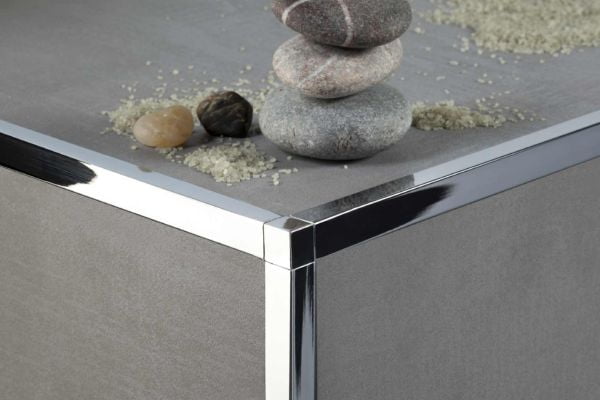

Struggling to pick a tile trim color? You want a perfect finish, but the wrong choice can ruin your entire project. It’s a surprisingly stressful decision.
The best tile trim color often matches the tile for a seamless look. Alternatively, matching the grout creates a subtle frame. For a bold statement, choose a contrasting color like matte black or brushed gold to create a feature.
Choosing the right trim color is a small detail with a huge impact. It can be the difference between a professional-looking job and an amateur mistake. As someone who has spent years in the tile trim industry, from the factory floor to running my own business, I’ve seen it all. I want to share what I’ve learned to help you make the right choice with confidence. Let’s break down the options so you can get that perfect finish you’re looking for.
Should Tile Trim Match Tile or Grout?
You’re standing there with tile in one hand and grout samples in the other. Now you need a trim. The pressure is on to make these three elements work together.
Deciding whether to match your trim to the tile or the grout depends on the look you want. Match the tile for a blended, modern feel. Match the grout to outline and define the tile shape, creating a subtle, intentional frame.
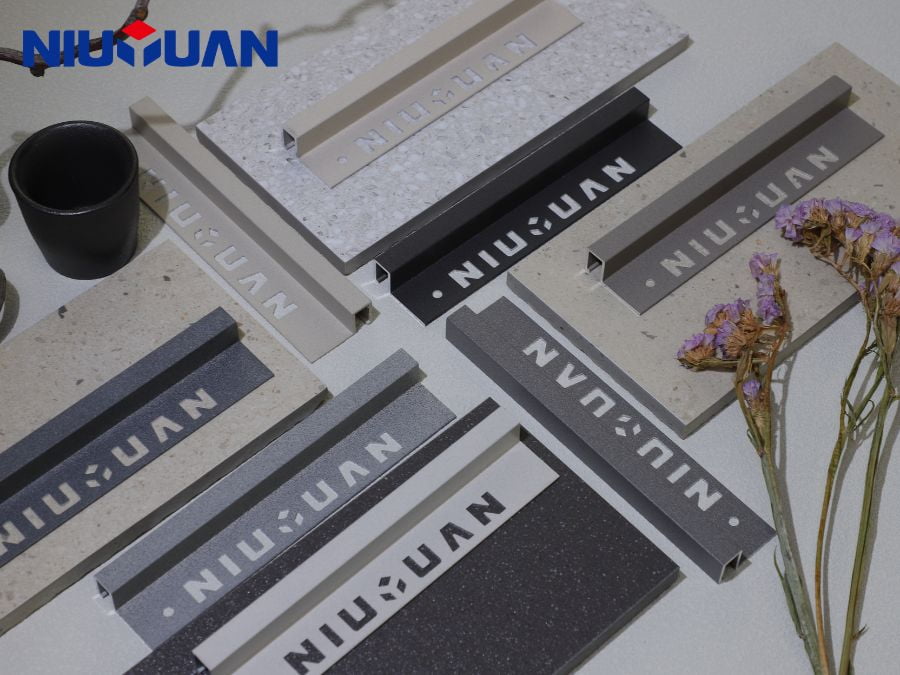
This is one of the most common questions I get from designers like Jacky and even from my own clients. The “right” answer really depends on the final aesthetic you’re trying to achieve. There isn’t a single rule, but understanding the effect of each choice is key. I’ve guided countless clients through this decision, and we can break it down into three simple approaches.
Matching the Tile: The Seamless Approach
Matching your trim color to your tile color is the most popular choice for a reason. It creates a clean, uninterrupted, and modern look. The trim blends in, making the surface appear as a single, cohesive unit. This is my go-to recommendation for minimalist designs or when the tile itself has a bold pattern that should be the star of the show. For example, if you have a beautiful marble-effect porcelain tile, a trim that matches the main background color of the tile will finish the edge without distracting from the stone’s veining.
| Tile Type | Desired Effect | Best Trim Choice |
|---|---|---|
| Minimalist White Subway | Clean & Unbroken | White or Bright Anodized Aluminum |
| Patterned Ceramic | Focus on Pattern | A trim matching the tile’s base color |
| Natural Stone Effect | Monolithic & Solid | Trim that mimics the stone’s primary hue |
Matching the Grout: The Framing Approach
Choosing a trim that matches the grout color creates a different effect entirely. It produces a subtle outline around the tiled area, almost like a picture frame. This can be very effective for defining the space and can highlight the shape of the tiles themselves. Imagine a wall of classic white subway tiles with a dark grey grout. A dark grey trim would tie the whole look together, emphasizing the grid pattern and giving it a sharp, graphic quality. This works best when your grout color is already chosen as a deliberate design feature.
The Third Option: Intentional Contrast
Sometimes, you don’t want to match anything. You want the trim to be a feature in its own right. A contrasting trim color can add a touch of luxury, a bit of industrial edge, or a pop of modern drama. Think about matte black trim against a white tile, or a brushed gold trim with a deep green tile. This is a deliberate, bold design choice. It says the trim isn’t just a functional piece; it’s part of the decor. I once worked with a client who used a matte black square edge trim with a simple beige tile, completely elevating the space from standard to high-end designer look.
What is The 1/3 Rule for Tile?
Heard of the “1/3 rule” but not sure what it is? It sounds like a complex installer’s secret, and you’re worried about getting your tile layout wrong.
The 1/3 rule, or one-third offset, is a tile-laying pattern where each tile is offset by one-third of the length of the tile next to it. It creates a staggered, random look and is ideal for hiding imperfections in large format tiles.
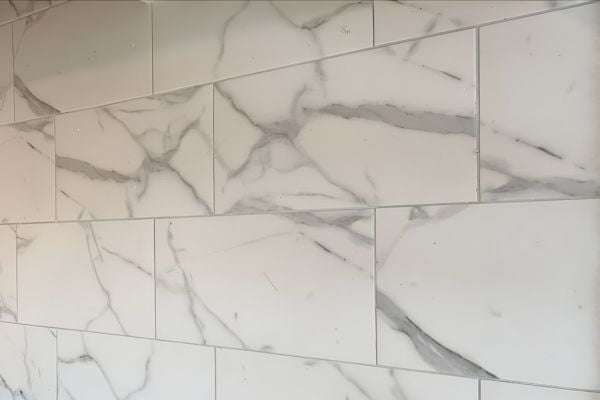
The standard brick pattern, or 50/50 offset, is what most people know. But in my years of manufacturing and design, I’ve seen how the 1/3 offset can solve a lot of problems and create a more sophisticated look. It’s a technique that product designers like Jacky appreciate because it addresses both form and function, especially with the trend towards larger and longer plank-style tiles.
Understanding the 1/3 Offset Pattern
Imagine you’re laying a row of rectangular tiles. For the next row, instead of starting the first tile at the halfway point of the one below it (which is a 1/2 or 50% offset), you start it at the one-third point. This creates a cascading or diagonal effect in the pattern that is less uniform than a standard brick layout. It feels more organic and less rigid. This pattern is particularly useful for long plank tiles that mimic wood, as it avoids the “stair step” look that a 50/50 offset can sometimes produce.
Why Use the 1/3 Rule?
There are two main reasons to choose a 1/3 offset.
- Aesthetics: The primary reason is visual. The 1/3 offset breaks up the rigid grid of a standard layout. It creates a more dynamic and random appearance which can make a space feel more modern and less repetitive. It’s a subtle change that can have a big impact on the overall feel of the room.
- Functionality: This is the big one. Almost all large format tiles (tiles with one side 15 inches or longer) have some degree of “bowing” or “cupping” in the center. This means the middle of the tile is slightly higher than the ends. When you lay these tiles in a 50/50 offset, you are placing the highest point of one tile (the center) directly next to the lowest point of the tile next to it (the end). This exaggerates the bowing and can lead to “lippage,” where one tile edge is higher than its neighbor. The 1/3 offset helps to minimize this by keeping the highest point of any tile further away from the lowest point of the adjacent tile. Most tile manufacturers actually recommend a maximum offset of 33% for their large format tiles for this very reason.
| Problem with Large Tiles | 50/50 Offset Effect | 1/3 Offset Solution |
|---|---|---|
| Inherent Bowing/Cupping | Exaggerates lippage (uneven edges) | Minimizes lippage for a flatter finish |
| Repetitive Look | Can create visible “stair steps” | Creates a more random, natural pattern |
I remember a project with a client who insisted on a 50/50 offset for some very long wood-look planks, against my advice. Halfway through, they saw the lippage and we had to pull everything up. We re-laid it with a 1/3 offset, and the result was perfectly flat and looked fantastic. It was a costly lesson for them, but one that proves the importance of this rule.
What is the Best Tile Trim for Beige Tiles?
Beige tiles can feel a bit too safe or dated. You want a trim that elevates the look, but you’re scared of making a choice that looks cheap or clashes.
For a classic look with beige tiles, use a champagne or light bronze trim. For a modern feel, a matte white or brushed nickel trim adds subtle contrast. For a bold, high-end statement, choose a matte black or brushed gold trim.
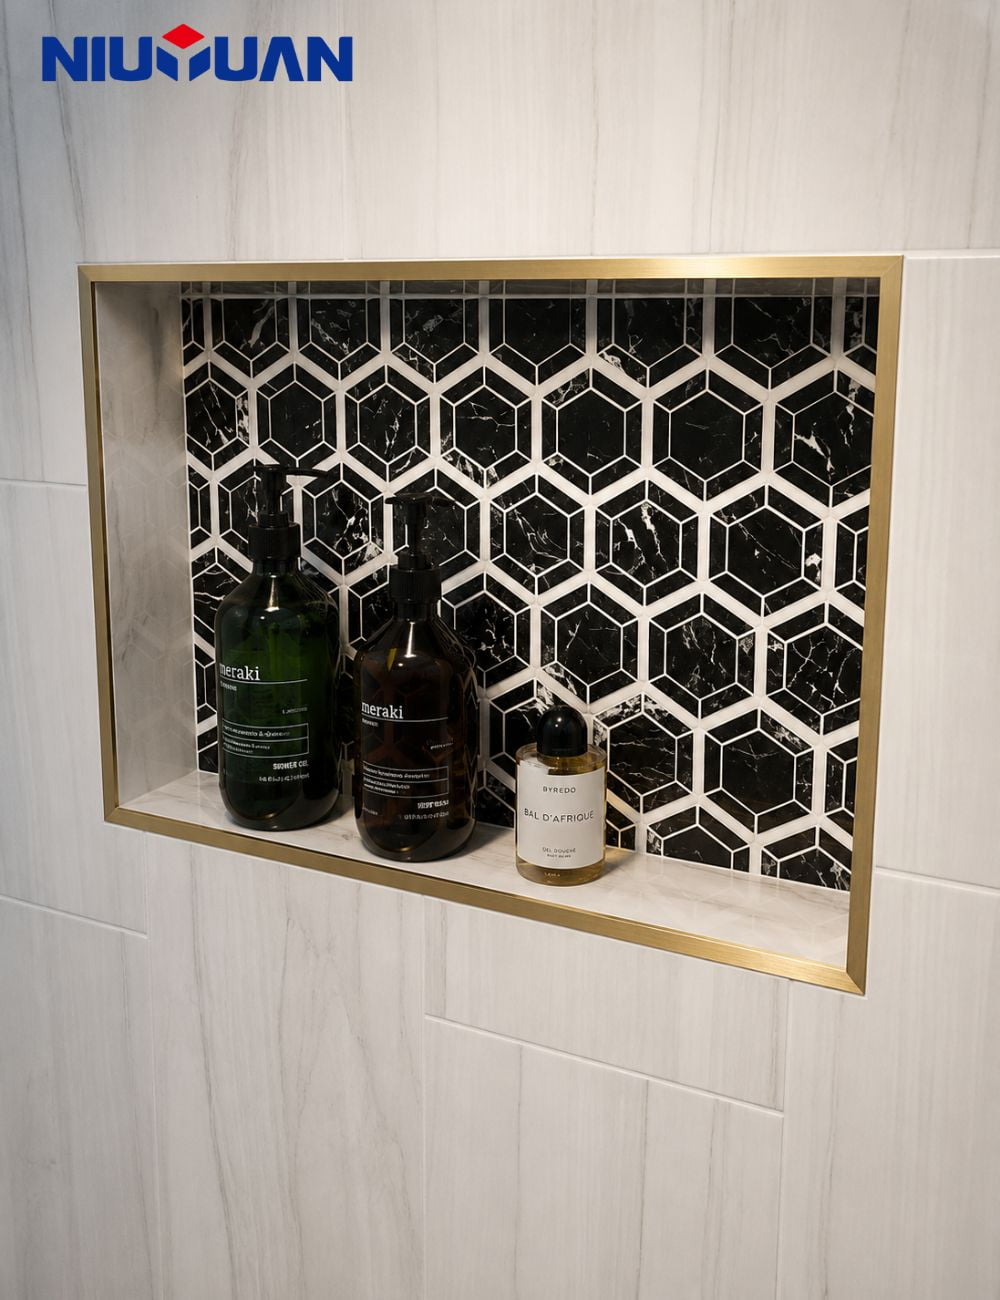
Beige is a classic for a reason. It’s warm, versatile, and can create a very calming space. But the trim you pair with it can completely change its character. I’ve helped so many clients take their beige tiles from “boring” to “brilliant” just by choosing the right profile and finish. As a designer, Jacky would know that the material and finish details are what separate a basic design from a truly thoughtful one. Let’s look at the different directions you can go.
Creating a Harmonious and Warm Look
If your goal is a soft, seamless, and inviting space, you’ll want a trim that blends with the beige tones. You’re not looking for contrast, but for harmony. Think about warm metallic finishes that complement the undertones of your specific beige tile. A creamy beige tile pairs beautifully with a champagne or brushed brass finish. A sandier, more earthy beige might look stunning with a light bronze or an anodized nickel finish. The goal is to find a trim that has a similar “temperature” to the tile. This creates a cohesive and understatedly luxurious feel, where the finish is elegant without shouting for attention.
| Beige Tile Shade | Harmonious Trim Finish | Desired Vibe |
|---|---|---|
| Creamy / Off-White Beige | Champagne, Brushed Brass | Soft, Luxurious, Warm |
| Sandy / Earthy Beige | Light Bronze, Anodized Nickel | Natural, Grounded, Calm |
| Greige (Grey-Beige) | Brushed Nickel, Titanium | Modern, Cool, Sophisticated |
Introducing Subtle, Modern Contrast
Maybe you want a little more definition than a perfectly blended look can offer. You can introduce contrast without being too dramatic. This is about adding a clean, crisp line that defines the edge of the tile. With a beige tile, a matte white trim is a fantastic choice. It provides a clean, bright edge that feels modern and fresh without being jarring. Another great option is a brushed nickel or stainless steel trim. These cooler metals work surprisingly well with warmer beige tiles, creating a sophisticated palette that feels very current. It’s a way to gently nudge a traditional color into a more contemporary space.
Making a Bold, Designer Statement
This is my favorite approach for making beige tiles look expensive and custom. Use your trim to make a statement. The number one choice for this is matte black. The contrast between a warm, soft beige and a stark, modern matte black trim is stunning. It’s dramatic, confident, and instantly makes the entire installation look high-end. I have recommended this combination countless times, and it never fails to impress. Another bold choice is a rich brushed gold or bronze. Unlike the softer brasses, a deep gold creates a deliberate and luxurious contrast, turning the tile edge into a true design feature. This is how you give a simple beige tile a powerful personality.
What Tile Trim Do I Need?
You’re at the store and there’s a whole wall of tile trims. Different shapes, different materials, different sizes. It’s overwhelming and you just need to know which one is right.
First, identify the trim’s job: protecting an edge (L-shape), transitioning floors (T-shape), or finishing a wall corner. Second, choose a material like aluminum for walls or durable stainless steel for floors. Finally, match the trim depth to your tile’s thickness.
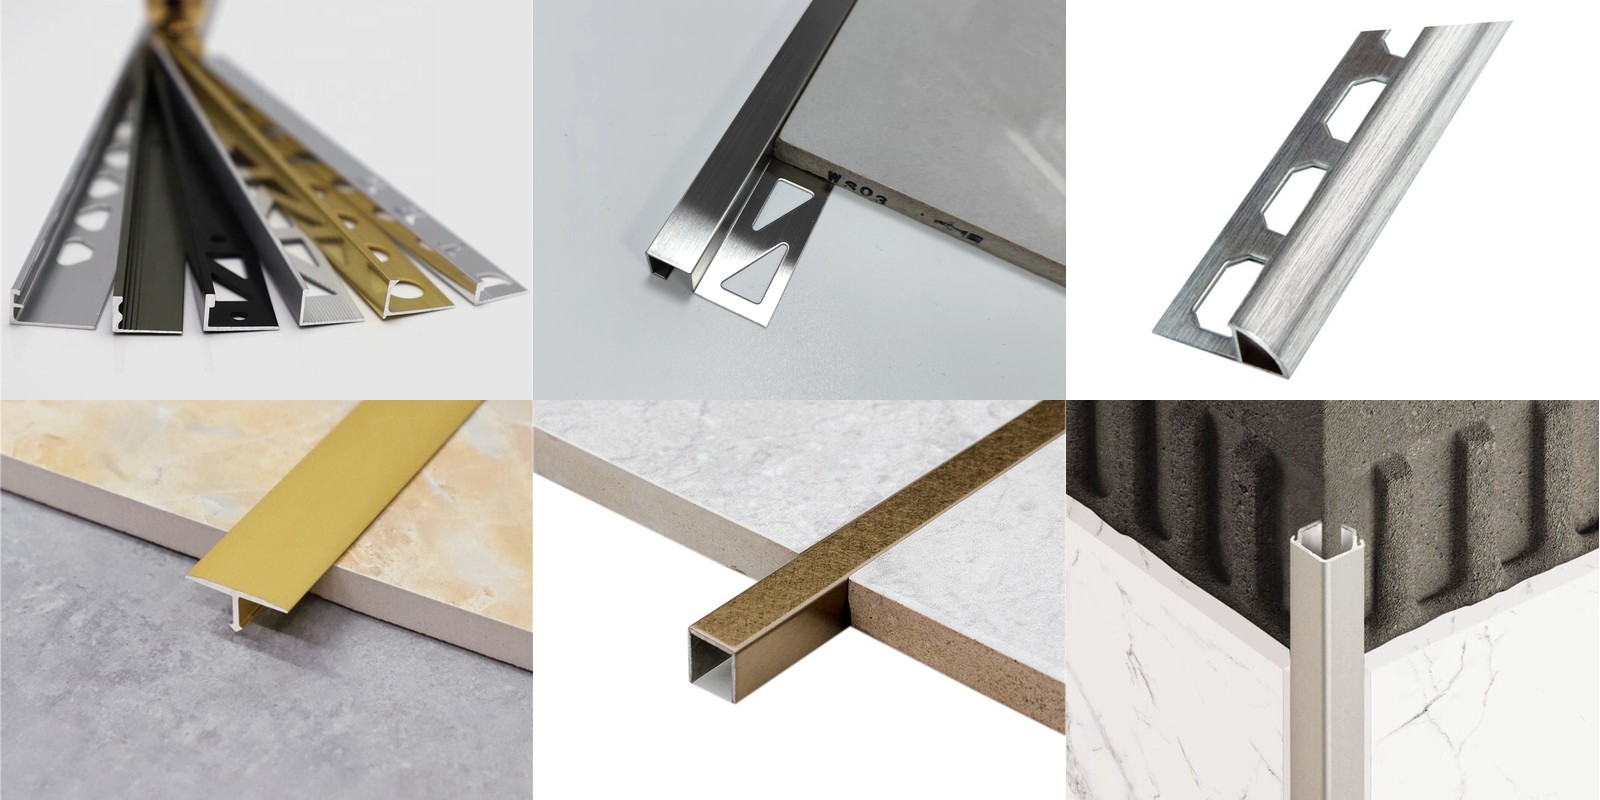
Walking into a supplier and seeing all the options can be confusing. But once you know what to look for, it’s simple. From my time on the factory floor, I can tell you that every single one of those trims was designed for a specific purpose. A designer like Jacky needs to specify the exact right trim to ensure the project is both beautiful and built to last. Let’s break it down into three simple steps so you can choose the perfect trim every time.
Step 1: Identify the Trim’s Function and Shape
First, what does the trim need to do? The shape of the trim, or its profile, is determined by its job.
- Edge Protection: If you’re ending a run of tiles on a wall or a floor, you need to protect the raw edge. The most common profile for this is a straight edge or L-shape trim (like our NIUYUAN square edge profile). It covers the unglazed edge and gives a clean, straight line. A round edge or quadrant profile does the same job but provides a softer, curved finish which is great for safety in areas with children.
- Floor Transitions: Are you moving from a tiled floor to another flooring type, like carpet or wood, of a similar height? You’ll need a T-shape profile. The top of the “T” covers the gap between the two floors, creating a smooth transition.
- Corners: For external wall corners, an L-shape or round edge profile is perfect. It protects the vulnerable corner from chips and damage. For internal corners, while you can use caulk, a cove-shaped profile provides a neat, hygienic, and easy-to-clean solution.
Step 2: Choose the Right Material
Next, consider the material. This choice depends on the location and the look you want.
| Material | Key Characteristics | Best For |
|---|---|---|
| Aluminum | Lightweight, huge range of colors and finishes (anodized, powder-coated), affordable. | Walls, backsplashes, decorative areas with low foot traffic. Not as scratch-resistant as steel. |
| Stainless Steel | Extremely durable, corrosion-resistant, hygienic. More expensive. | Floors, high-traffic areas, wet rooms (showers), commercial kitchens, areas requiring high durability. |
| PVC (Plastic) | Inexpensive, 100% waterproof, flexible. Can look less premium. | Budget projects, bathrooms, areas where you need a flexible trim. |
I always advise my clients to invest in stainless steel for floor transitions and any high-traffic areas. The durability is worth the extra cost in the long run. For walls, aluminum offers the most design flexibility.
Step 3: Get the Sizing Right
This is a critical step that many people get wrong. The trim’s height or depth must correspond to the thickness of your tile. If your tile is 8mm thick, you need an 8mm trim. A trim that’s too small will leave the tile edge exposed and unprotected. A trim that’s too big will stick out and create an uneven surface.
My simple rule: Trim Height = Tile Thickness.
When you buy your trim, bring a piece of your tile with you. Hold the trim profile against the edge of the tile. The top of the trim should sit perfectly flush with the face of the tile. I’ve seen so many projects compromised by the wrong size trim. It’s a small detail that makes all the difference between a professional and an amateur job.
Conclusion
Choosing the right tile trim comes down to matching it to your desired look—blended, framed, or contrasted—and ensuring it is the correct shape, material, and size for your specific project.
If you need to purchase tile trim in bulk for your recent project or business, please feel free to contact us.