
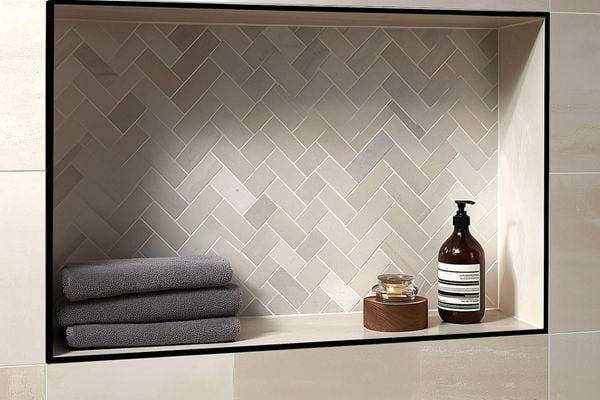
Your tiling project looks amazing, but those raw, unfinished edges are a major problem. They can easily chip and crack, ruining your hard work and making the whole project look incomplete.
The best tile edge trim depends on your project’s specific needs, including aesthetics, durability, and the tile location. Metal trims, like those from NIUYUAN, offer a modern look and superior protection, while traditional bullnose edges provide a softer, integrated finish. Your choice will define the style and longevity of your work.
I’ve seen every kind of tile installation during my years in this business, from my early days on the factory floor to helping clients grow their own companies. The difference between an amateur job and a professional one often comes down to the small details, especially how the tile edges are finished. It’s not just about looks; it’s about protecting your investment for years to come. Let’s walk through the options so you can choose the perfect trim with confidence and get that professional result.
Is It Better To Use Schluter Or Bullnose?
You’re at a crossroads in your project, deciding between a sleek metal trim and a classic bullnose. This choice will impact not just the look, but also the durability of your tile work.
For most applications, a Schluter-style metal trim is the superior choice. It provides greater impact resistance, a wider variety of modern profiles and finishes, and is generally more cost-effective than sourcing or creating bullnose tiles, which can be expensive and limited in availability.

When I first started in a tile trim factory, the debate between metal profiles and traditional bullnose was already a hot topic. As a designer like Jacky knows, the choice is about balancing aesthetics, function, and manufacturing reality. A bullnose edge, which is a tile with a factory-finished rounded edge, offers a seamless, traditional look because it’s made from the same material as your field tile. The color match is perfect. However, not all tile series come with a matching bullnose piece. When they do, it can be significantly more expensive per piece. Sometimes, you have to pay to have them custom-made, which adds time and cost.
Metal tile trims, often known by the popular brand name Schluter, are a different story. They are a separate component added during installation. This gives you incredible design freedom. You can match your fixtures with a matte black or brushed nickel trim, or create a bold contrast. From a practical standpoint, my experience has shown that a quality aluminum or stainless steel tile trim offers much better protection against chips and cracks from impacts—something a ceramic bullnose edge is vulnerable to.
| Feature | Metal Trim (e.g., Schluter) | Bullnose Tile |
|---|---|---|
| Durability | High (especially stainless steel) | Moderate (can chip) |
| Aesthetics | Modern, clean lines, high contrast | Traditional, seamless, integrated |
| Cost | Generally lower | Often higher, can be very expensive |
| Availability | Widely available in many styles | Limited to specific tile series |
| Installation | Requires precise cuts for corners | Simpler layout, no special cuts |
How To Choose The Right Tile Trim?
Standing in front of a display of tile trims can be paralyzing. Pick the wrong one, and you could create a visual clash or, worse, leave your tile edges vulnerable to damage.
To choose the right trim, first assess the location for durability needs. Then, select a profile shape that matches your design aesthetic—square for modern, rounded for classic. Finally, pick a material and finish that complements your tile, grout, and fixtures for a cohesive look.

I always advise designers to think of tile trim not as an afterthought, but as a key design element. A product designer like Jacky would approach this systematically, and you should too. It’s a process I’ve refined over years of helping clients. First, think about where the tile is. A trim for a low-traffic decorative backsplash can be chosen for its looks, so a sleek aluminum profile might be perfect. But for a high-traffic floor transition or a staircase edge, you must prioritize strength. In that case, I would always guide you toward stainless steel for its superior impact and scratch resistance.
Next, consider the shape, or profile. Do you want the trim to stand out or blend in? A square L-shaped profile creates a sharp, clean line that is very popular in contemporary and industrial designs. A rounded, or quadrant, profile gives a softer, more traditional feel and is also safer for corners in homes with children. Finally, think about the finish. We manufacture trims in dozens of finishes. The trend right now is to match the trim to the faucets and showerheads. A matte black trim with matte black fixtures creates a stunningly cohesive and high-end look. Don’t be afraid to ask for samples to see how they look next to your actual tile.
What Tile Edging To Use For Different Areas?
The trim you select for your shower niche isn’t the right choice for your garage step. Using the wrong trim in a demanding area can lead to failure, posing safety risks and costly repairs.
Use highly durable stainless steel trims for floors and stairs, focusing on stair-nosing profiles for safety. For walls and backsplashes, aluminum and PVC offer more decorative flexibility. On countertops, choose food-safe materials like stainless steel for hygiene and durability.

In my manufacturing business, we create trims for very specific applications, a detail that someone like Jacky, with his focus on optimizing for function, would appreciate. It’s crucial to match the product to the environment. A common mistake I see is using a light-duty decorative aluminum trim on a floor. It might look good for a month, but it will quickly get dented and scratched. That’s why we always guide our clients to the right material for the job. Let’s break it down into a simple chart, which is how I often explain it to my clients to make the choice clear.
| Area | Recommended Profile | Recommended Material | Key Considerations |
|---|---|---|---|
| Stairs | Stair Nosing | Aluminum, Stainless Steel, Brass | Safety First. Must be durable and often have a slip-resistant surface. |
| Floor Edges | L-Shape, Transition Profile | Stainless Steel, High-Grade Aluminum | High Impact. Needs to withstand foot traffic and impacts from vacuums or furniture. |
| Wall Corners | L-Shape, Round Edge, Square | Aluminum, PVC, Stainless Steel | Aesthetic & Protection. Balances visual appeal with corner protection. |
| Backsplashes | All Profiles | Aluminum, PVC | Mainly Decorative. The primary role is to create a clean, finished edge. |
| Countertops | L-Shape, Square Profile | 304/316 Stainless Steel | Hygiene & Durability. Must be food-safe, non-porous, and resistant to scratches. |
Thinking about these applications during the design phase saves a lot of headaches later. For example, when designing a commercial kitchen, we would only use 304-grade stainless steel trim for countertops to meet health codes. For a home user, this same logic ensures a long-lasting, clean, and professional installation.
What Is The Best Way To Finish Tile Edges?
You’ve got your tile and the perfect trim. Now for the most critical part: the installation. A sloppy job here can make even the most expensive materials look cheap and unprofessional.
The best and most durable method is to embed your tile trim directly into the adhesive as you lay the tile. This physically locks the trim in place, creating a seamless, protected, and professional edge that is vastly superior to simply applying a bead of caulk.

As someone who has built a business on manufacturing these profiles, I can tell you they are designed to be installed in a very specific way. The perforated anchoring leg on our trims isn’t just for show; it’s the key to a strong, permanent bond. When I train new staff or talk to clients, I always stress that this is the most important step. Don’t let your installer take a shortcut by just sticking the trim on with silicone after the tile is set. That will fail.
Here is the simple, correct process. First, you do a dry fit and cut your trim to length. For corners, a miter box and a fine-toothed hacksaw will give you a clean 45-degree cut. Next, apply your tile adhesive or thin-set mortar to the substrate. Then, press the anchoring leg of the trim firmly into that bed of adhesive. You want the mortar to push up through the holes. Then, apply more mortar on top of the anchoring leg and set your tile, making sure the top of the tile is flush with the top edge of the trim profile. This method mechanically fastens the trim, making it an integral part of the tiled surface. It ensures a crisp, clean line that protects the vulnerable tile edge from any impact.
Conclusion
Ultimately, choosing the correct tile trim is about protecting your tile and perfecting your style. With this knowledge, you can confidently select and install the right profile for a beautiful, long-lasting finish.
If you are currently looking to purchase various tile trims for your business or project, please take a look at our NIUYUAN series of tile trims. We also offer custom manufacturing.