Broken tile edges look terrible and are dangerous to touch. You want a smooth, professional finish, but installing metal trim feels tricky. Do not worry, the process is actually quite simple.
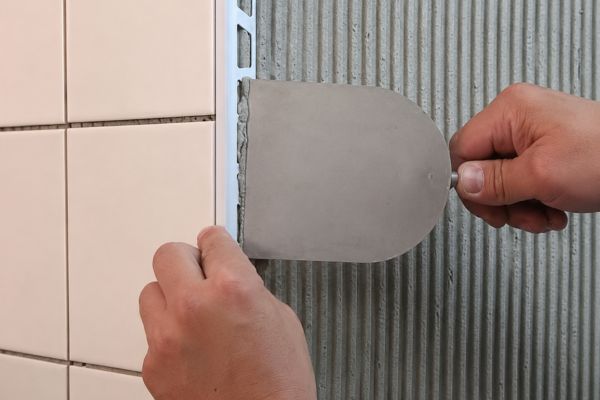
To install tile trim, measure and cut the profile to size. Apply tile adhesive to the wall or floor. Press the trim's perforated leg into the adhesive. Trowel more adhesive over the leg. Lay your tiles so they sit flush against the trim edge.
Many contractors rush this step. They end up with loose trims or uneven gaps that catch dirt. I see this often in my line of work. You must follow the right steps to avoid these mistakes. Let us look at the details of how to do this properly.
How do you attach tile trim?
Loose trim ruins a whole bathroom renovation quickly. You need it to stay stuck for years. Using the wrong glue is a disaster waiting to happen.
Attach tile trim by embedding the anchoring leg into the wet thin-set mortar. The holes in the leg allow the adhesive to pass through. This creates a strong bond between the substrate, the trim, and the tile. Do not use just glue on the back.
I want to explain why the "anchoring leg" is so important. When you look at the trims we make at NIUYUAN Metal, you see a flat part with many holes. This is not to save metal. It is for the mechanical lock.
When you push the trim into the wet mortar (thin-set), the mortar squeezes up through these holes. When that mortar dries, it forms solid plugs. The trim is now physically locked into the wall. It cannot pull away unless you break the wall.
Here is the best way to do it:
- Comb the Adhesive: Use a notched trowel to spread your adhesive on the wall.
- Press the Trim: Push the perforated leg into the adhesive.
- Wiggle it: Move it slightly to ensure the adhesive comes through the holes.
- Add More: Put a little more adhesive on top of the leg to make it level with the tile back.
I often see people trying to use construction glue (like Liquid Nails) on the back of the trim. This is a bad idea for standard edging. It adds thickness and does not bond well with the cement board. Stick to the thin-set mortar you use for the tiles.
Below is a table to help you choose the right bonding material:
| Material | Application | Recommended? |
|---|---|---|
| Thin-set Mortar | Standard ceramic or porcelain tiling | Yes (Best) |
| Epoxy Mortar | Areas with harsh chemicals or heavy water | Yes |
| Construction Adhesive | Attaching trim to dry wall without tile | No |
| Double-sided Tape | Temporary fixing | No |
Also, the quality of the trim matters here. We use 6063-T5 virgin aluminum. It is strong. If you use cheap, recycled aluminum, the leg might bend when you push it. A bent leg makes the trim sit unevenly. You need rigid material for a straight line.
Do you put tile trim on before tiling?
Tiling a whole wall and forgetting the trim is a nightmare. You have to rip tiles out. It wastes time and expensive material.
Yes, you usually put tile trim on at the same time as you tile, specifically right before placing the adjacent row of tiles. You cannot easily install standard flange trim after the tiles are dry because the anchoring leg needs to go under the tile.
Timing is everything in tiling. You cannot treat trim as an afterthought. It is an integral part of the structure. I always tell my wholesale clients to remind their customers: plan the layout first.
Think of it as a "work as you go" process. Here is a common scenario I see with shower niches:
- You tile the back wall of the niche first.
- Then you measure and cut the trim for the sides.
- You install the trim.
- Then you tile the side walls and the main wall.
If you tile the side walls first, you have nowhere to put the trim leg. You would have to chip away the dried mortar, which destroys the waterproofing.
There are exceptions. Some "retrofit" profiles exist. These usually have a T-shape or a flat back. You push them into a gap after tiling. However, they are not as strong. The standard L-shape, Round, or Square trims must go in during the installation.
Here is a breakdown of when to install different profiles:
| Profile Shape | Installation Time | Why? |
|---|---|---|
| L-Shape | During Tiling | Leg goes under the tile. |
| Round / Square | During Tiling | Leg goes under the tile. |
| T-Shape | After Tiling | Fits into the gap between two floors. |
| Stair Nosing | During Tiling | Needs strong anchor under the tread. |
| Listello | During Tiling | Sandwiched between two rows of tile. |
At our factory, we ensure our trims are perfectly straight. We cut them with a tolerance of ±0.5mm. This helps you. When you are working fast with wet cement, you do not want to fight with a bent piece of metal. You can slide our trim in, and it lines up perfectly with your tile row. If the trim is bowed, you will have gaps. Always check your trim straightness before you start mixing glue.
Can I screw in tile trim?
Sometimes glue does not feel safe enough for heavy traffic areas. You might worry the trim will pop off. You wonder if screws are a better option.
You generally do not screw in standard tile trim for walls or light floors. However, for floor transitions between carpet and tile, or heavy-duty stair nosing, using screws is common. Some profiles come with pre-drilled countersunk holes for this exact purpose.
This question depends on where the trim goes. Are you doing a bathroom wall or a busy shop floor?
For Wall Tiles and Countertops: Do not use screws. The screw head will stick up. It will prevent the tile from sitting flat. Also, drilling into the wall might break the waterproofing membrane behind it. The mortar bond is strong enough for these areas.
For Floor Transitions (Carpet to Tile) and Stair Nosing: Screws are very useful here. These areas get stepped on every day. Foot traffic creates vibration. Over time, glue might crack. Screws provide a mechanical anchor that does not fail.
If you decide to screw the trim down, you must follow these rules:
- Use Flat Heads: The screw must sit flush with the metal.
- Countersink: The hole in the metal must be cone-shaped so the screw head hides inside it.
- Plug Works: If you are screwing into concrete, use a plastic plug first.
We often get requests for custom orders. Some commercial projects require screw holes. We can punch these holes in the factory. We can even provide screws that match the color of the trim. This looks very neat.
Here is a guide on fastening methods based on the location:
| Location | Fastening Method | Reason |
|---|---|---|
| Shower Corner | Thin-set Mortar | Waterproofing safety. |
| Kitchen Splashback | Thin-set Mortar | Aesthetic, no bumps. |
| Doorway (Tile to Laminate) | Screws or Adhesive | High foot traffic. |
| Stair Edge (Nosing) | Screws + Adhesive | Safety critical. Must not move. |
| Expansion Joint | Embedded in Mortar | Needs to move with the building. |
If you buy standard trim from a hardware store, it usually does not have holes. If you try to drill it yourself, be careful. You might scratch the anodized surface. Our anodizing is thick (≥10μm), but a drill bit is sharper. If you must drill, drill from the top side down to avoid burrs on the visible face.
Do you silicone around tile trim?
Water getting behind your tiles causes mold and rot. Grout cracks over time. You need a seal that stays flexible and waterproof.
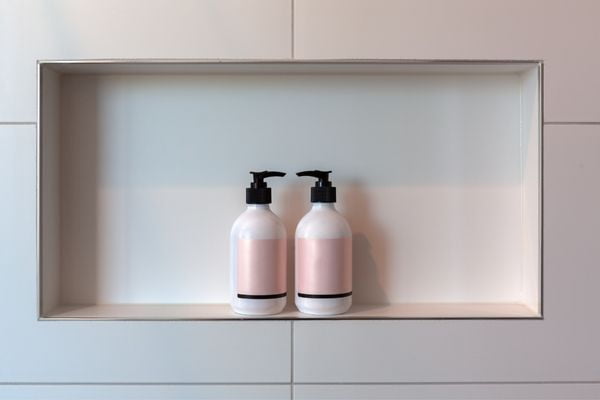
Yes, you should silicone around tile trim in wet areas like showers or splashbacks. Use silicone where the trim meets a different material, like a bathtub or countertop. This creates a movement joint and stops water from getting behind the tiles.
Many people think grout is waterproof. It is not. Grout absorbs water. Also, metal and ceramic expand at different rates when they get hot.
If you grout right up to the metal trim in a hot shower, the metal expands more than the tile. This pressure will crack the grout. Once the grout cracks, water gets in. This is why silicone is vital. It is flexible. It acts like a shock absorber.
Where to apply silicone:
- Internal Corners: Where two walls meet.
- Bottom Edge: Where the wall trim meets the floor or shower tray.
- Material Changes: Where tile meets a window frame or a bathtub.
The 2mm Gap Rule: Do not push the tile tight against the metal trim. Leave a gap of about 1.5mm to 2mm. You can fill this gap with grout if it is on a dry wall. But in a wet area, fill this gap with silicone.
Here is a comparison of fillers:
| Feature | Grout | Silicone |
|---|---|---|
| Flexibility | Low (Rigid) | High (Elastic) |
| Waterproof | No (Porous) | Yes |
| Application | General joints | Corners and material changes |
| Maintenance | Needs sealing | Needs replacing eventually |
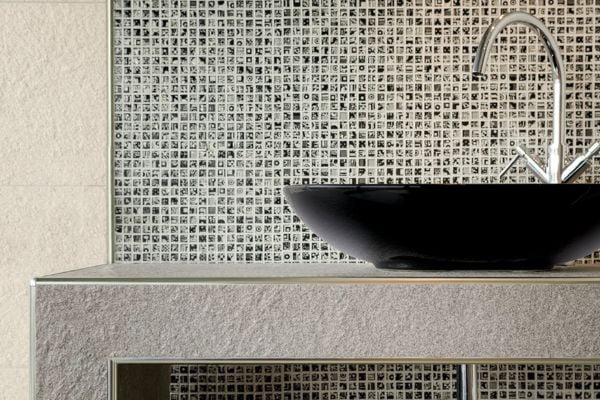
At NIUYUAN Metal, we chemical polish our trims. This gives them a shiny, chrome-like look (500+ Gloss Units). If you smear grout on this, it can be hard to clean off if it dries. Silicone is easier to wipe away while wet.
Also, consider the color. You can buy silicone that matches your grout color. Or you can use clear silicone. If you have our custom-colored trim, clear silicone is usually the best choice. It makes the transition look seamless.
Remember, the trim protects the tile edge. The silicone protects the wall behind it. You need both for a bathroom that lasts 10 years or more.
Conclusion
To install tile trim correctly, measure accurately, embed the leg in mortar, install it while tiling, and seal gaps with silicone. Following these steps ensures a durable, professional finish.