
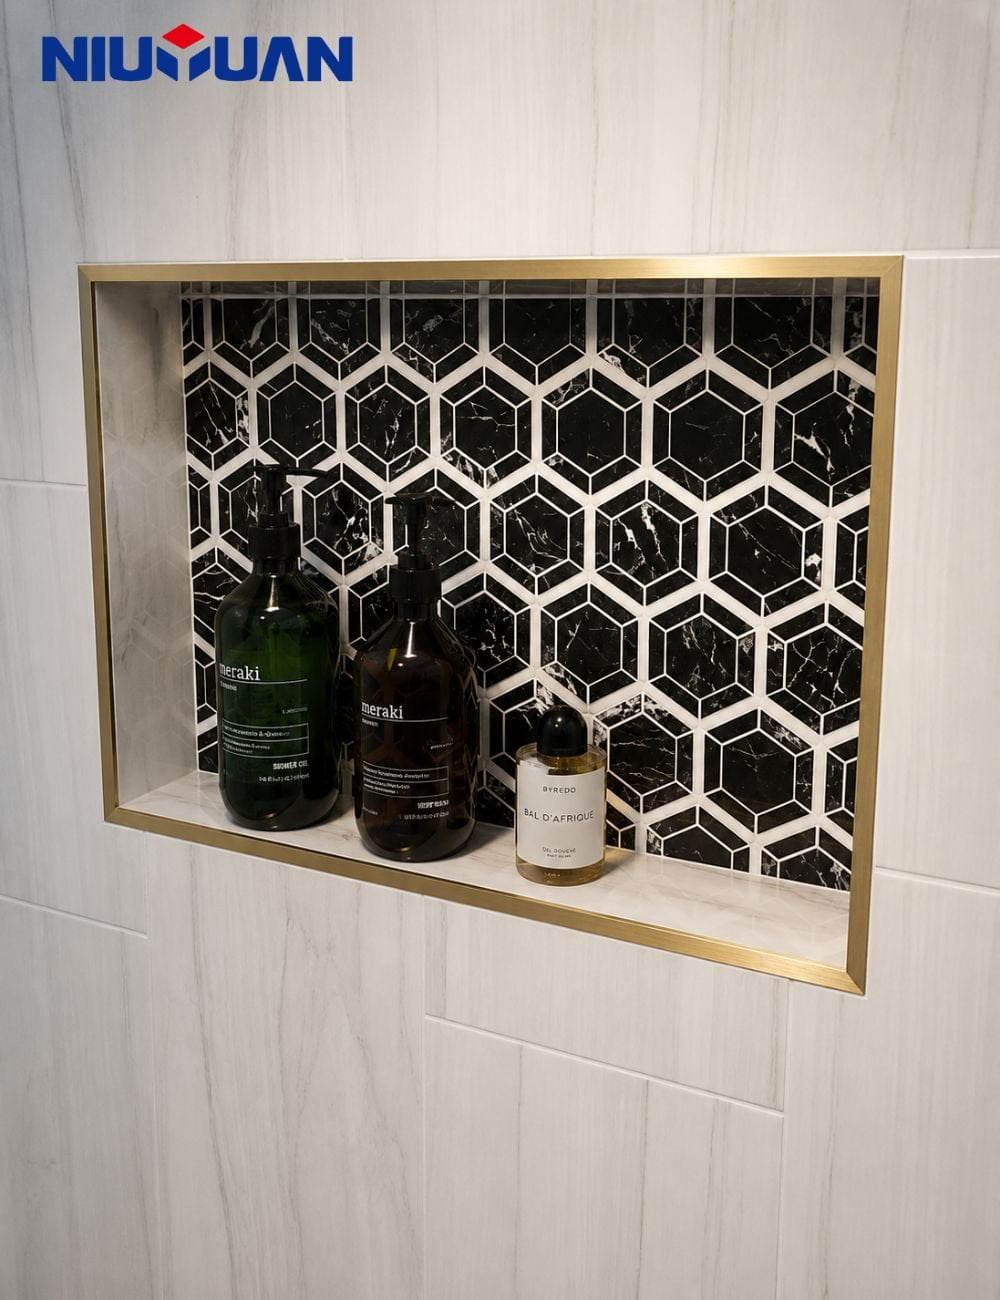
Shower Niche Tile Trim: Corners, Slope and Finish Matching
A shower niche fails at its edges, not in its middle. The opening has four outside corners, a sill that must drain, and inside corners that move. Get those three details right, and the niche looks built in rather than cut in. This guide covers the trim choices that decide that result: profile shape, corner joints, sill fall, and finish matching.
The audience here is twofold. Importers and distributors need the specification questions that prevent wrong-size orders. Installers and tilers need the sequence that keeps water out. Both groups share one rule: decide the trim before the tile goes up, because the trim sets the opening size and the sill height.
Why a niche opening is not a wall edge
A wall edge is one straight line, but a niche opening is a frame. It has four outside corners where wall tile meets recessed tile, and the eye reads all four at once. A small gap or a chipped edge at any corner stands out, because the opening is at eye level and lit from the front. Trim choice is therefore a finish decision, not an afterthought.
The opening also works harder than a wall edge. Shower spray hits it daily, bottles sit on its sill, and water pools wherever the sill is flat. The trim must protect cut tile edges from chips, cover the joint between two tile planes, and still look like part of the wall. Metal profiles do all three, which is why they dominate niche work.
- Protect: the profile covers cut tile edges that would otherwise chip.
- Join: the profile bridges the wall plane and the recessed niche plane.
- Finish: the profile sets the visible frame line the eye judges first.
Pick the frame profile before you set tile
Choose the profile shape first, because each shape reads differently at the corner. A sloped L profile gives a slim, angled face that suits modern flat tile. A square profile gives a crisp right angle that matches large-format porcelain. A rounded profile softens the corner and suits handmade or glossy tile. All three use an anchoring leg bedded in thinset behind the tile.
Material and finish come next. Stainless steel suits wet areas and holds up to daily cleaning. Anodized or coated aluminium gives the widest colour range, including matte black and brushed nickel looks. Match the finish to the shower fittings, not just to the tile, so the niche frame, mixer trim, and drain grate read as one set.
| Profile shape | Corner look | Best with |
|---|---|---|
| Sloped L | Slim, angled face | Flat modern tile |
| Square | Crisp right angle | Large-format porcelain |
| Round | Soft radius | Glossy or handmade tile |
Height is the sizing rule that prevents most ordering mistakes. The profile must stand at least as tall as the tile plus its thinset bed. A 10 mm tile on a 2 mm bed needs a 12.5 mm profile, for example. A profile that sits low leaves a proud tile edge that chips. A profile that stands high creates a lip that catches water and dirt.
The four outside corners
The opening has four outside corners, and they are the most visible joints in the niche. Metal profiles meet at 45-degree mitres, cut with a fine blade and dry-fitted before any thinset is mixed. A dry fit shows a short leg or a wide gap while it is still cheap to fix. Once the profile is bedded, a bad mitre can only be hidden, never corrected.
Pre-formed corner pieces are the alternative where the range offers them. They remove the mitre cut entirely and give a consistent corner across many niches. For a distributor, that consistency matters: one corner piece per corner, with no site cutting skill required. Check corner-piece availability before ordering profiles for a multi-unit project, not after.
- Mitring: cut both legs at 45 degrees so the joint closes at 90 degrees.
- Dry fit: assemble all four frame pieces around the opening before bedding.
- Square check: confirm the frame is square, or opposite mitres will not match.
- Corner pieces: where stocked, they replace mitres and speed repeat work.
The sill must drain
The sill is the only horizontal surface in the niche, and it is where water sits. Build a fall into the sill before tiling, so water runs out toward the shower. Guides reviewed for this article converge on a fall of about 1/8 inch per foot of sill depth. Some installers go steeper, toward 1/4 inch per foot. Sources disagree on the exact figure, so treat the range as the working target and check the membrane maker’s detail.
Set the sill tile first, then the sides, then the top. This order shingles each joint so water flows over it rather than into it. Check the fall with a level before grouting: the bubble must lean toward the shower. A flat sill looks fine on handover day and fails months later, when standing water stains grout and feeds mould at the back joint.
- Fall: about 1/8 inch per foot of sill depth, toward the shower.
- Order: sill tile first, side tiles next, top tile last.
- Level check: verify the fall before grout, not after.
- Bottle test: the fall must stay gentle enough for bottles to stand.
Inside corners and the waterproof junction
Waterproofing must run unbroken from the shower wall into the niche box. The membrane inside the niche has to tie into the wall membrane, with seams overlapped and inside corners pre-treated before the main coat. A niche cut into a finished waterproof wall, then tiled without re-sealing the box, is a leak waiting for a grout crack. Prefabricated foam niches arrive pre-sealed with a pre-sloped sill, which removes most site seams.
Inside corners of the box move, so they take flexible sealant, not rigid grout. Grout across a change of plane cracks as the building moves, and the crack becomes a water path behind the tile. Run a continuous silicone bead at every inside corner of the box, colour-matched to the grout. The trim covers the outside corners; sealant owns the inside ones.
- Continuity: one membrane system from wall face into the niche box.
- Corners first: pre-treat inside corners before the main membrane coat.
- Sealant, not grout: flexible sealant at every change of plane.
- Pre-formed option: factory-sealed foam niches cut site seam work.
Finish unity: tile, trim, and fittings as one set
A niche looks intentional when three finishes agree: the niche interior tile, the wall tile, and the trim. Two routes work: the quiet route uses the same tile inside the niche as on the wall, so the trim frame is the only accent. The accent route uses a contrasting mosaic or stone inside the niche, with the trim picking up a fitting finish. Both routes fail when the trim matches neither the tile nor the fittings.
Grout lines decide the rest. Align the top and bottom edges of the opening with horizontal grout lines on the wall, so no sliver cuts appear around the frame. Plan the opening size from the tile module, not from a round number alone. A 12 by 24 inch opening suits common stud bays and many tile courses, but the final size should land on a grout line.
Size the opening to the trim and the framing
Framing sets the opening before trim ever arrives. Standard studs at 16 inches on centre leave about 14.5 inches of clear bay width. A 2 by 4 wall gives about 3.5 inches of niche depth. Common single-bay niches are therefore 12 by 24 inches or 14 by 24 inches tall, or 12 by 12 inches square. A wider niche needs a stud cut and a header, which is framing work, not trim work.
| Opening type | Typical size | Framing note |
|---|---|---|
| Single-bay tall | 12 by 24 or 14 by 24 inches | Fits between studs, no cutting |
| Single-bay small | 12 by 12 inches | Fits between studs |
| Wide horizontal | 24 to 36 inches wide | Needs a header; check the load path |
Height placement follows use, not fashion. A niche base at roughly 48 to 60 inches above the finished floor suits standing adults, putting bottles at chest to eye level. In a tub shower, the base drops lower for seated reach. Confirm the height against the tile courses before cutting, since moving a framed opening costs far more than moving a pencil line.
Buyer checklist for importers and distributors
Use these questions when specifying niche trim for a project or a stock range. Each one prevents a common ordering error, and none of them needs a site visit to answer. Work through them before placing the order, not after the tile arrives.
- Which profile heights cover the tile thicknesses your customers buy: 6, 8, 10, or 12 mm?
- Are matching corner pieces stocked for each profile shape in the range?
- Which finishes match current fitting ranges: chrome, brushed nickel, matte black?
- What lengths are supplied, and how many niches does one length frame?
- Is the profile material suited to constant wet use: stainless steel or coated aluminium?
- Is profile height confirmed against tile plus thinset, not tile alone?
Mistakes that show up after handover
- Flat sill: standing water stains grout and feeds mould at the back joint.
- Grout in inside corners: it cracks at changes of plane and opens a water path.
- Trim height below tile: the proud tile edge chips on first contact.
- Mitres cut without a dry fit: gaps appear at eye level after bedding.
- Trim finish matching nothing: the niche looks added later, not designed in.
- Opening cut without a grout-line plan: sliver tiles crowd the frame.
Related reading
- tile trim size guide: match profile height to tile thickness before ordering.
- wall tile edge trim guide: full wall runs, of which the niche is one detail.
- shower tile trim: profiles made for shower walls and wet areas.
- bathroom tile trim: the wider bathroom trim range.
- inside corner tile trim: profiles for the internal corners around the niche.
- tile trim corner pieces: pre-formed corners that replace site mitres.
- how to install tile trim: the general setting sequence behind this guide.
FAQ
What trim profile suits a shower niche?
A sloped L profile is the usual default: slim, clean, and easy to mitre at the four corners. Choose a square profile for large-format porcelain, where a crisp right angle matches the tile. Choose a rounded profile for glossy or handmade tile, where a soft radius hides small edge chips best.
How much should a niche sill slope?
Build a forward fall of about 1/8 inch per foot of sill depth, toward the shower. Some installers go steeper, toward 1/4 inch per foot. Keep the fall gentle enough for bottles to stand, and check it with a level before grouting.
Should inside niche corners be grouted or sealed?
Sealed, because inside corners are changes of plane and grout across them cracks as the building moves. Run a continuous silicone bead, colour-matched to the grout, at every inside corner of the niche box. Recheck the bead at handover, since a gap there is the leak path.
What size niche fits between standard studs?
Studs at 16 inches on centre leave about 14.5 inches of clear bay width. Common single-bay niches are 12 by 24 inches or 14 by 24 inches tall, or 12 by 12 inches square. Depth in a 2 by 4 wall is about 3.5 inches.
Can the niche tile differ from the wall tile?
Yes. Use the same tile for a quiet look, with the trim as the only accent. Or use a contrasting mosaic or stone inside the niche for an accent look. Either way, the trim finish should match the tile or the shower fittings, not neither.
Does a niche need a different trim height than a wall edge?
No, the rule is the same: profile height must cover tile plus thinset. Measure at the niche itself, because the interior tile may differ in thickness from the wall tile around it. A height that fits the wall can still leave a proud edge inside the niche.


