
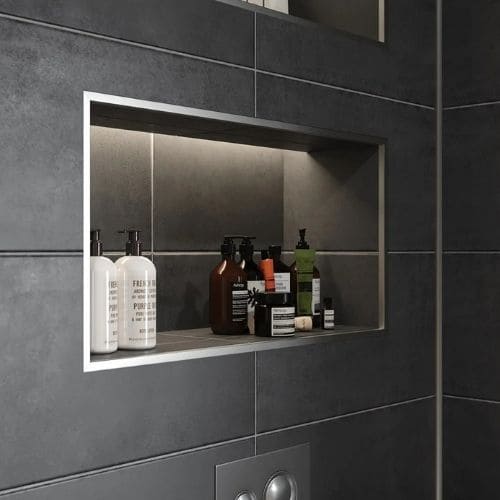
Yes — around a tiled opening, tile trim can do the architrave’s job. The trim becomes the frame for the opening. It covers the cut tile edges on the jambs and the head. It also protects the corners from knocks and leaves a clean finished line where the timber architrave would normally sit.
Architrave is the British term for the decorative trim that frames a door or window opening. US readers usually call the same piece door casing or door trim. This guide covers tiled doorways and window reveals only. For whole tiled walls, see the wall tile edge trim guide instead, because a wall and an opening are detailed differently.
Profiles for Openings at a Glance
| Profile | Visible face | Corner joint options | Common aluminium heights | Standard lengths | Best opening use |
|---|---|---|---|---|---|
| L-shaped | Straight 90° face | 45° mitre, or factory corner pieces | 6 / 8 / 10 / 12 mm | 2.44 / 2.5 / 2.7 / 3.0 m | The default for doorways: widest material and finish range |
| Square-edge | Flat, angular face | 45° mitre, or factory corner pieces | 6 / 8 / 10 / 12 mm | 2.44 / 2.5 / 2.7 / 3.0 m | Window reveals with rectified tiles and a modern line |
| Round-edge | Rounded, softened face | 45° mitre, or factory corner pieces | 6 / 8 / 10 / 12 mm | 2.44 / 2.5 / 2.7 / 3.0 m | Sills and busy doorways where edges take knocks |
Heights and lengths above are the common aluminium reference options listed on the aluminium range page. One rule runs through the whole table: the opening is framed and ordered as a single unit. Mixing profiles or finishes between the sides and the head breaks the frame at exactly the point where people look. See the L-shaped range and the square-edge range for the two profiles that do most of this work.
What the Architrave Normally Hides
An architrave does three jobs at once, and it is worth naming them before removing it. It covers the joint between the door casing and the wall surface. It hides uneven cuts and small gaps along that joint. And it gives the opening a finished face that matches the joinery in the rest of the room.
Remove it, and all three jobs pass to the tile and the trim instead. The tile layout must reach the casing cleanly, because nothing will cover a ragged cut afterwards. The trim covers the exposed tile edge and takes the knocks that the corner would otherwise take. That is why this detail is planned before tiling starts, and not after the architrave comes off.
Doorways: Three Sides and a Moving Door
A doorway is framed on three sides: two jambs and a head across the top. The trim runs up one jamb, across the head, and down the other jamb in one continuous line. At the two top corners, the vertical and horizontal lengths meet and turn. Use factory three-way corner pieces where the range offers them, or cut neat 45-degree mitres instead.
The door itself sets the limits for the whole detail. The leaf swings inside the casing, and the hinges and latches sit close to the tiled face of the wall. Keep the trim line on the wall face, clear of the swing and clear of the hardware. Check that clearance with the door actually hung, and not from the drawing alone.
A doorway also moves in daily use. Doors get closed hard, and the casing takes that vibration through the frame every day. Finish the joint between tile and casing with a flexible sealant, and not with rigid grout. Grout in that joint cracks over time, while the sealant absorbs the movement instead.
Window Reveals: Frame All Four Sides
A window reveal is a shallow box made of two side jambs, a head, and a sill. Tile the reveal so that the grout lines continue from the main wall into the opening without breaking. That continuity is what makes the reveal look planned from the start rather than patched in afterwards.
The trim sits at the outer corner, exactly where the wall face turns into the reveal. Run the same profile and the same finish on all four sides of the opening. Put the cut edge of each reveal tile toward the window frame itself. The factory edge then faces the room, where it will actually be seen.
Deep reveals need one extra habit: measure every side separately before cutting anything. The depth of a reveal often varies by a few millimetres between the top and the bottom. Tiles cut from a single measurement will drift out of line with the wall grout joints. Cut each reveal tile to its own measured position instead.
Treat the sill as its own surface, with its own job to do. In a shower or another wet wall, the sill must fall toward the room so that water drains off it. No trim line can fix a sill that slopes back toward the window frame.
Corners: Mitres or Corner Pieces
Every opening turns corners, and the corner joint is where this whole detail succeeds or fails. You have two routes available. Cut the trim ends at 45 degrees and mitre them together on the corner. The alternative is factory corner pieces that join the straight lengths for you.
Mitres suit square-edge and L-shaped profiles best when the opening itself is truly square. Corner pieces forgive small errors in the opening and repeat exactly at every corner. The corner piece range covers inside, outside, two-way and three-way joints, in leg heights of 8, 10 and 12 mm.
Either way, dry-fit every piece before any adhesive is mixed for the job. Openings are rarely perfectly square, so measure and cut each side on its own merits. A corner corrected on the bench costs a few minutes of work. The same corner corrected in set adhesive can cost the whole run.
Sizing: Tile First, Casing Second
Size the trim from the tile, exactly as you would on any other wall. The profile height must cover the tile thickness plus the adhesive bed beneath it. Measure the tile at its thickest point, and size the whole opening from that figure. The full measuring method is set out in the size guide.
Then check the casing against that same plane before you commit. The trim line only reads straight if the casing face sits in the same plane as the tiled wall. If the casing sits proud or recessed, correct that first, before tiling starts. Pack it out or re-set it while the wall is still open. Trim follows the plane it is given, and it cannot level a stepped casing.
Materials Around an Opening
Aluminium is the usual starting point for an opening. It offers the widest finish range, so the frame can match the taps, the handles and the rest of the room. Stainless steel suits wet rooms and openings that take daily contact from hands and bags. PVC works in dry, low-impact rooms, but it is not the first choice beside a busy door. The profiles guide compares the core shapes side by side if you are still choosing between them.
Arched and Open Doorways
Some doorways have no door at all: cased openings and arches between two rooms. The same framing logic applies, but both sides of the opening are visible and both need finishing. Tile and trim must wrap the full depth of the reveal, from one room’s wall face to the other’s.
On a curved arch, a straight rigid profile cannot follow the line of the opening. Flexible PVC versions of round-edge profiles can follow a gentle curve, which makes them the practical choice there. On a square cased opening, treat the head corners exactly like a doorway’s top corners.
When Keeping the Architrave Is the Better Call
This swap is not always the right answer, and it is worth saying so plainly. Keep the architrave where the reveal itself is not being tiled, because trim has no tile edge to finish there. Keep it where the other doors in the same room keep theirs, because one frameless doorway among framed ones looks unfinished.
Keep it, too, where the casing cannot be brought flush with the tile plane without major joinery work. A stepped casing under tile trim shows its step at every angle of light. In those rooms, tiling up to a well-fitted architrave gives the cleaner result with far less risk.
Before You Start: Five Checks
- Decide the architrave question before tiling. Once tiles reach the casing, refitting timber over them is a different and harder job.
- Confirm the casing face is flush with the planned tile plane, on both jambs and across the head.
- Dry-fit the full trim frame, corners included, and check the door swing and hardware clearance.
- Count corner pieces for every turn: two three-way corners per doorway, and four corners per window reveal.
- Plan a flexible sealant joint where tile meets the casing or the window frame, and grout everywhere else.
For the straight setting work away from the opening, the installation guide covers setting trim in adhesive step by step. The opening itself needs one extra habit on top of that. Treat it as a frame, measure it as a frame, and order it as a frame.
Frequently Asked Questions
Can tile trim completely replace architrave?
Around a tiled opening, yes. The door casing, also called the lining, stays in place as before; only the decorative face trim is left off. The tile trim then covers the tile edges and the joint line instead of the timber. On untiled walls the architrave still has a real job, so this swap belongs to tiled openings.
What is architrave called in the US?
Door casing or door trim. The piece this guide replaces is the decorative frame fixed to the wall face around the opening. It is not the structural frame inside the wall that the door actually hangs from.
Should window trim run on all four sides of the reveal?
Yes, if the reveal is tiled. One profile and one finish on the jambs, the head and the sill reads as a single deliberate frame. A different sill material can still work well, but it should be a deliberate break, and not a leftover length.
Are corner pieces better than mitred trim corners?
Neither method is always better than the other. Mitres give a continuous metal line and suit openings that are genuinely square. Corner pieces are faster to fit, repeat exactly, and forgive small errors in the opening. Pick one method per opening, and then use it at every corner.
What if my door casing is not flush with the wall?
Fix the plane before any tiling starts: pack the casing out or re-set it, so that its face aligns with the finished tile surface. Trim set over a stepped casing will show that step at every angle of light in the room.