
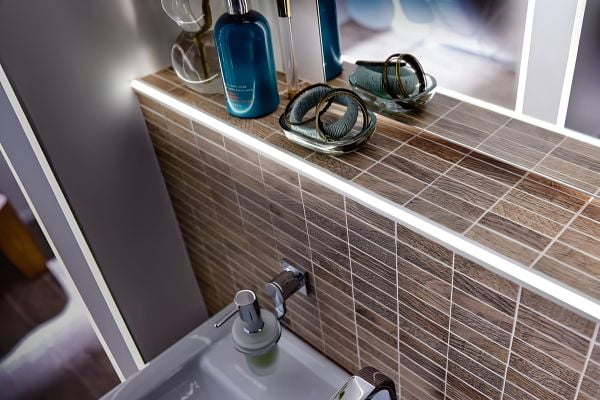
LED tile trim is not one product — it is a system of three parts that have to fit each other: an aluminum channel that sits in or on the tiled surface, an LED strip that slides into the channel, and a polycarbonate diffuser that snaps over the top and shapes the light. Most buying mistakes come from choosing the three parts separately: a strip too wide for the channel, a clear diffuser where a dot-free line was expected, or a dry-area profile installed in a shower. This guide walks through the five decisions in the order they should be made — profile shape, strip match, diffuser, IP rating, then finish and power planning — using the specification ranges published on our LED tile trim product page as the worked example.
What LED tile trim is — and what it is not
An LED tile trim profile is an extruded aluminum channel with a snap-on diffuser, designed so the light line ends flush with the surrounding tile instead of sitting on top of it as an afterthought. The aluminum does two jobs: it holds the strip in a straight line, and it works as a heat sink, drawing warmth away from the diodes, which is what protects strip life over years of use. The diffuser does the optical job: it spreads the output of individual diodes into an even line.
It helps to be clear about scope before you compare prices. The trim itself is the channel and diffuser. The LED strip, the power supply (driver) and the wiring are electrical components that may come from the same supplier, from your local electrical wholesaler, or from stock you already carry. When you compare quotations, confirm exactly what each price includes — channel only, channel plus diffuser and end caps, or a complete kit — because those are three different offers wearing the same product name. Our RFQ checklist at the end of this guide lists the scope questions to ask.
Step 1: Choose the profile shape by position
Shape follows position. The four shapes on the NIUYUAN LED range cover the positions buyers ask about most:
| Profile shape | Typical position | What to confirm |
|---|---|---|
| Flat recessed | Feature walls, backsplashes, niches — a light line set into a flat tiled surface | Channel depth against tile thickness and adhesive bed, so the diffuser finishes flush |
| L-corner | Inside and outside corners where two tiled planes meet | Which corner orientation you need, and whether the light should wash one wall or both |
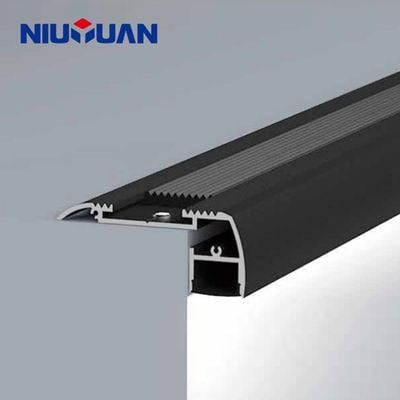
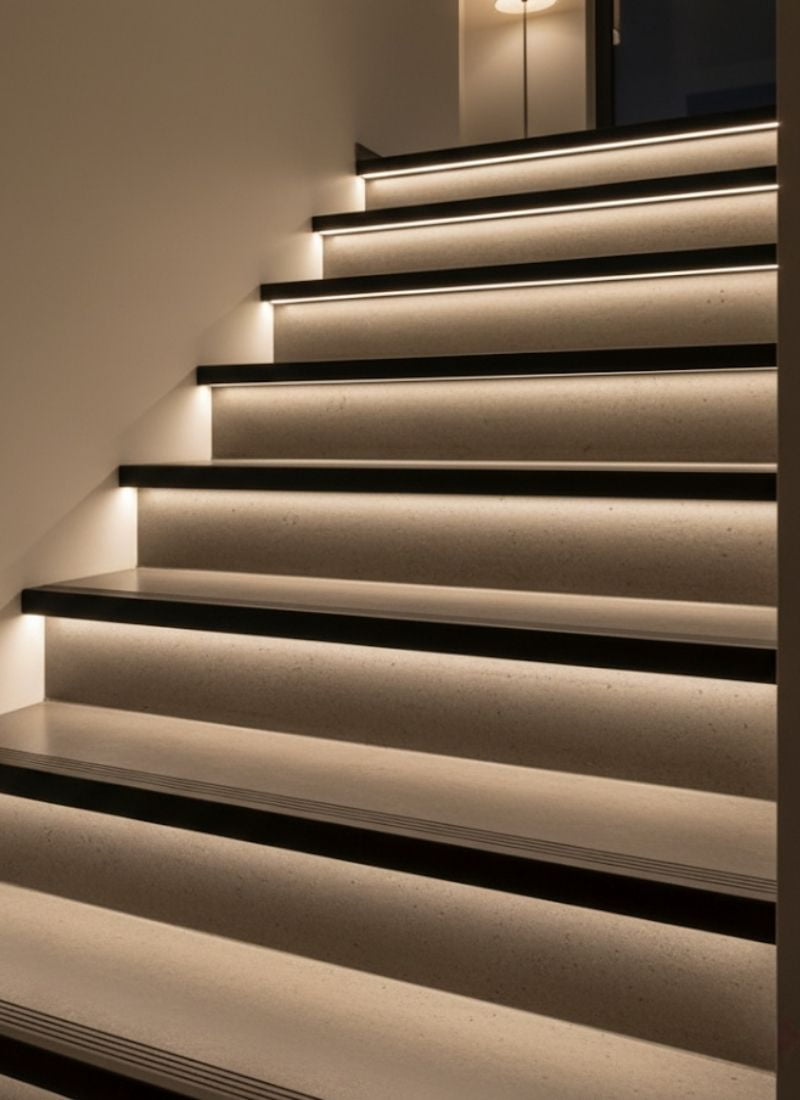
| Stair-nosing | Step edges — the light marks the tread edge and the profile protects it | Step material and fixing method; see our stair tile trim range for non-lit step profiles |
| Wall-washer | Runs that graze light down or across a wall surface | Distance from channel to the washed surface — the effect depends on it |
If you are new to profile shapes generally, our tile trim profiles guide explains how channel, edge and corner profiles differ before lighting is added.
Step 2: Match the channel to your LED strip
The channel’s internal width must accept the strip you actually plan to use — with room to slide the strip in and for heat to escape, not a squeeze fit. The NIUYUAN channels accept common 8 mm, 10 mm and 12 mm flexible LED strips on DC 12V or 24V. Three practical rules cover most projects:
- Lock the strip first, then the channel. Distributors usually pair the channel with tape their market already stocks. Send your strip width (and a strip sample or datasheet if you have one) with the RFQ so the channel and diffuser are matched to it, not the other way round.
- Density decides the dot-free question. A visible row of bright dots is the most common disappointment with lit trim. Higher-density strips — or COB strips, which hide individual diodes — combined with an opal diffuser and enough channel depth give the even line shown in product photos. A low-density strip under a clear cover will show every diode.
- Voltage is a system choice. 12V and 24V strips both fit mechanically; the choice affects driver selection and how long a run can be fed from one point. Leave the final circuit design to your electrician, and confirm driver position and cable entry points before tiling — they are very hard to change afterwards.
Step 3: Choose the diffuser for the light effect you want
The diffuser is the cheapest part of the system and has the largest effect on how the finished line looks.
| Diffuser | Light effect | Choose it when |
|---|---|---|
| Opal / frosted PC | Soft, even line; individual diodes hidden | The line itself is the design feature — niches, feature walls, mirrors, hotel and retail work |
| Clear PC (on request) | Maximum brightness; diodes may be visible | Output matters more than appearance, or the channel is hidden and only the light lands on a surface |
Two trade-offs to price in: an opal diffuser always passes less light than a clear one, so size the strip for the brightness you need after the diffuser, not before it. And a diffuser can shift the apparent color temperature slightly warmer, so approve the strip-and-diffuser combination as a lit sample, not from datasheets alone.
Step 4: Set the IP rating by area — honestly
On the NIUYUAN range, the standard rating is IP20, with IP65 available using sealed end caps for wet areas. Read that as a system statement, not a single number:
- Dry areas (living rooms, feature walls, retail displays): IP20 profiles are the standard choice.
- Splash areas (bathroom walls outside the shower, kitchen backsplashes, spas): specify the sealed-end-cap version, and confirm the rating of the strip itself as well — a sealed channel does not waterproof an unrated strip, and the cable entry is usually the weakest point.
- Direct water exposure (inside showers, pool surrounds): treat this as a project-specific specification. Confirm the complete assembly — profile, strip, end caps, cable entry and driver location — with the supplier and your electrician before ordering. For the surrounding wet-area tile edges themselves, our shower tile trim range covers the non-lit profiles.
Step 5: Finish, length and installation planning
Standard profiles are supplied in 2.5 m lengths, anodized in silver, black or champagne, or powder-coated in RAL colors — pick the finish to sit with the tapware and the other trims on the project, and check our tile trim finishes guide if the same room mixes lit and unlit profiles. Two installation facts are worth paying for at specification stage rather than on site: first, the strip slides into the channel and the diffuser snaps on and off, so a failed strip can be replaced later without removing the trim or damaging tiles — confirm this access is preserved where the profile will be tiled in. Second, drivers need a home: an accessible cupboard, ceiling void or cabinet near the run. A beautiful light line with a driver sealed behind tiles is a maintenance problem you have already bought.
The specification in one table
| Item | NIUYUAN LED tile trim (published range) |
|---|---|
| Channel material | 6063-T5 aluminum alloy, with polycarbonate (PC) diffuser |
| Strip compatibility | 8 mm / 10 mm / 12 mm flexible LED strips (DC 12V / 24V) |
| Profile shapes | Flat recessed, L-corner, stair-nosing, wall-washer |
| Standard length | 2.5 m (custom lengths available) |
| Diffuser | Opal / frosted PC; clear cover on request |
| Finishes | Anodized silver, black, champagne; powder-coated RAL colors |
| IP rating | IP20 standard; IP65 with sealed end caps for wet areas |
| MOQ / samples / bulk | 1,000 pcs per profile and finish; standard samples in 7 days, custom profiles 7–10 days; bulk 20–30 working days after deposit and drawing approval |
Five mistakes that cost buyers money
- Ordering the channel before choosing the strip. Width, density and voltage all flow from the strip. Lock the strip first.
- Judging brightness from the bare strip. The diffuser reduces and reshapes output. Approve a lit sample of the exact strip + diffuser pair.
- Specifying IP by room name instead of exposure. “Bathroom” covers both a dry vanity wall and the inside of a shower. Specify by actual water exposure, including the strip and cable entry.
- Forgetting the driver. No accessible driver location in the drawings means demolition later. Plan it before tiling.
- Comparing prices with different scopes. Channel-only, channel + diffuser + end caps, and full kit prices are not comparable. Normalize the scope first.
What to include in your RFQ
- Profile shape and installation position (with a drawing or photo if you have one)
- Your LED strip width, voltage and density — or a request to match a strip sample
- Diffuser choice (opal / frosted, or clear) and the light effect you need
- Installation area and required IP rating
- Finish and color, length per run and total quantity
- Scope to be quoted: channel only, or channel + diffuser + end caps — and whether strips/drivers are needed
This guide sits alongside the other buying guides in our tile trim buying guide hub — or contact us with your strip specification and drawings for a matched channel and diffuser quotation.
Frequently asked questions
What LED strips fit LED tile trim?
The NIUYUAN channels accept common 8 mm, 10 mm and 12 mm flexible LED strips on DC 12V or 24V. Send your strip width — or a strip sample — with your enquiry so the channel and diffuser are matched to the strip you will actually use.
How do I get a dot-free light line?
Use a higher-density strip (or a COB strip) with an opal or frosted diffuser, and approve a lit sample of that exact combination before bulk ordering. A low-density strip under a clear cover will show individual diodes.
Can LED tile trim be used in a shower or bathroom?
The standard profile is IP20 for dry areas; IP65 versions with sealed end caps are available for wet areas. The strip’s own rating and the cable entry must be confirmed as part of the assembly, especially for direct water exposure inside showers.
Can the LED strip be replaced after installation?
Yes. The diffuser snaps off and the strip slides out of the channel, so a failed strip can be swapped without removing the trim or damaging the tiles — confirm this access is preserved when the profile is tiled in.
What is the MOQ and lead time for LED tile trim?
MOQ is 1,000 pieces per profile and finish. Standard samples are ready in 7 days and custom profiles in 7–10 days; bulk production takes 20–30 working days after deposit and drawing approval.