
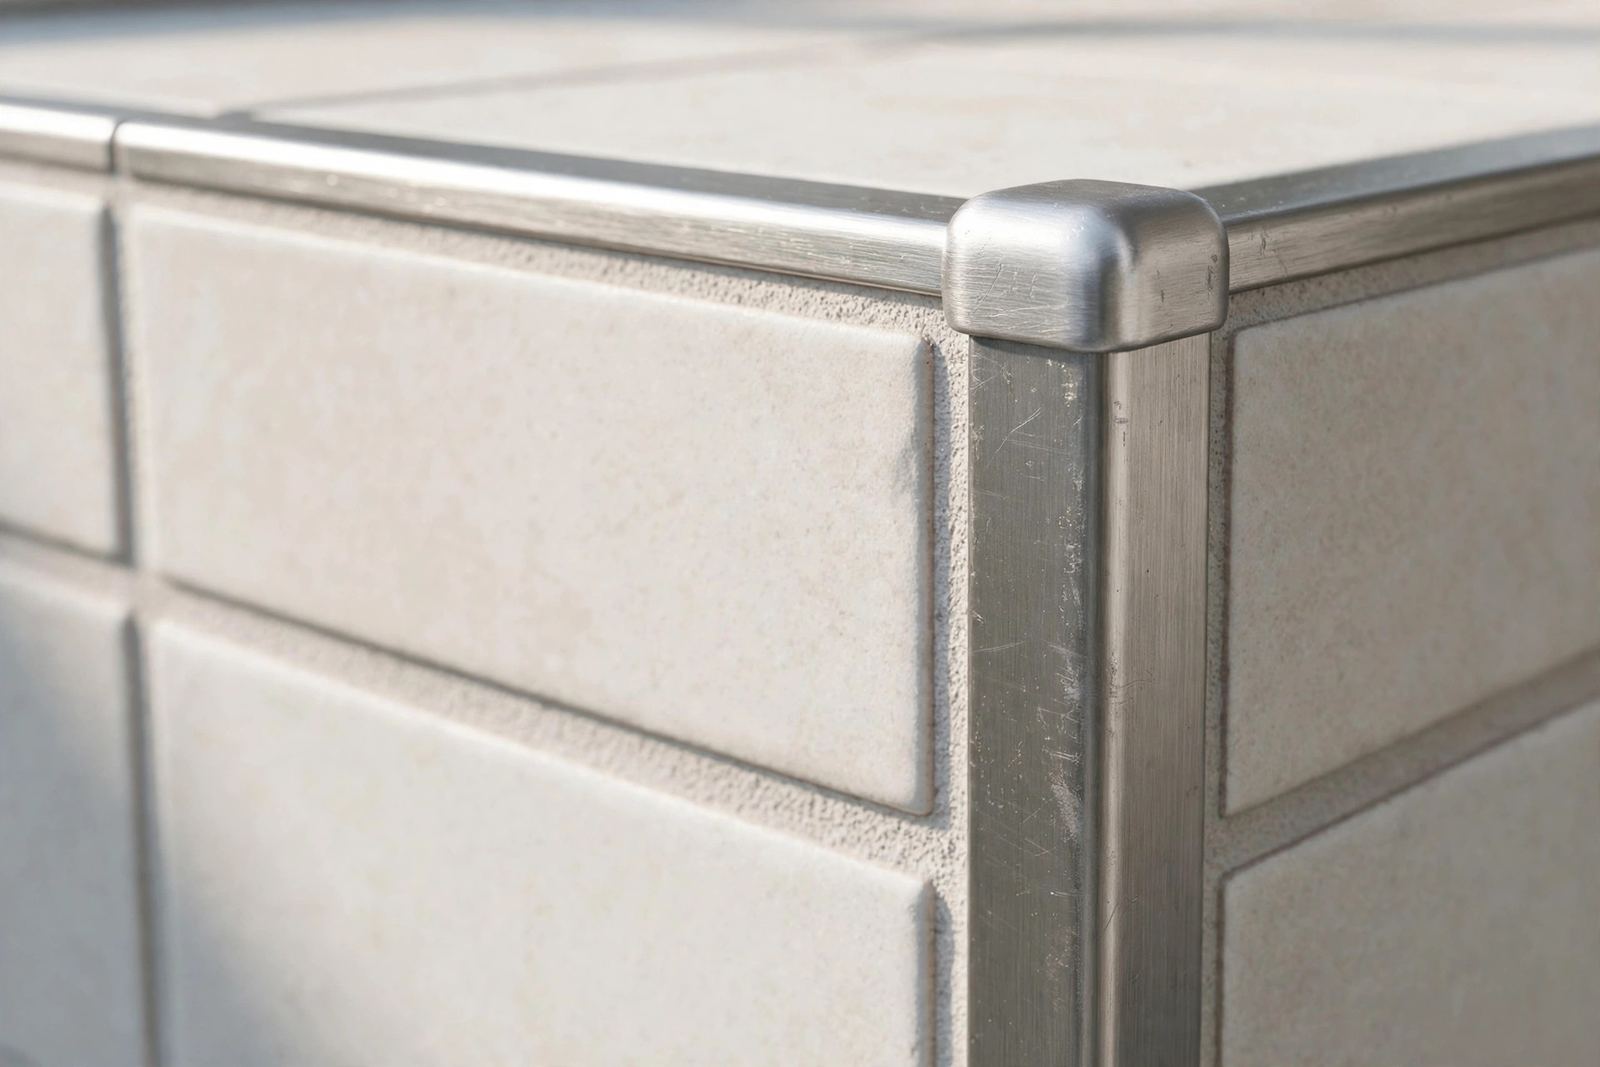
Every trim run ends somewhere, and the end is where a good job is judged. A run that stops at a wall, a door, or an open edge needs a planned finish, not a raw cut left to grout. Choose the end detail before tiling starts, because the best methods need the trim to be fixed while the adhesive is still workable.
First, name the end you are dealing with
Ends fall into three cases, and each case suits a different method. A run that dies into a wall can be closed by folding the trim back. It can also be butted neatly into the adjoining surface.
A run that stops in open space has no surface to die into. The top of a half height wall is one example, and it needs a cap or a folded return of its own. A run that meets another material needs a clean butt joint. Leave a small, even gap there for grout or sealant.
Mark every end on the layout before cutting. Count the ends, note which ones are in wet zones, and note which ones will be touched often. A shower wall end and a hallway wainscot end do not deserve the same detail. Wet ends need a sealed, closed finish. Dry ends that are rarely touched can use a simpler cap, provided the cap matches the profile height exactly.
Four ways to finish a trim end
| Method | Best for | Watch point |
|---|---|---|
| Factory end cap | Square, round, and L profiles with a matching cap in the range | The cap must match the profile height and finish; a near match will show. |
| Mitred return | Open ends and feature walls where a metal finish should wrap the edge | Needs an accurate 45 degree cut and a clean deburr, or the joint will gape. |
| Die into an adjoining surface | Runs that meet a wall, a frame, or a plinth | Leave a small gap for grout or sealant; do not force the trim tight into the surface. |
| Butt and seal | Runs that meet a door frame, a worktop, or a different material | The cut must be square and deburred, and the sealant must suit a wet or dry zone. |
A factory end cap is the simplest reliable finish when one exists for the profile. End caps close the hollow end of the profile, protect the cut edge, and give a factory finished face. Check cap availability at ordering time, not on site. Caps are profile specific. A cap for one height or shape will not fit a different profile, even if the two look alike in a photo.
A mitred return folds the trim back on itself at 45 degrees, so the visible face wraps around the end and returns to the wall. This method suits open ends where a cap would look like an added part.
It needs care. Cut both pieces at a true 45 degrees, and test the joint dry. Deburr the cut edges, then fix the return while the adhesive can still hold it. A return fixed after tiling, with glue alone, is far weaker than one bedded in adhesive during tiling.
How profile shape changes the choice
Square edge profiles take a cap or a mitred return well, because the flat face gives a clean joint line. Round edge profiles also take caps well. A mitred return on a round profile is harder to close neatly. The curve must meet at the same point on both pieces. Test a round profile return on a spare length before committing to it on a feature wall.
L shaped profiles are the most discreet, and that discretion makes their ends harder to hide. A small cap in the same finish is usually the best choice. A mitred return on a narrow face leaves very little surface to glue or bed. If no cap exists for the L profile in use, die the run into a wall or a frame where possible. Do not leave a narrow open end exposed.
For purpose made parts, see the tile trim end caps page and the corner pieces page. The tile trim accessories guide explains how the parts work together. Connectors join two lengths in a straight run; end caps close a run. The two parts are not interchangeable, and ordering one when the job needs the other is a common cause of site delays.
Cutting, fitting, and the mistakes that show
Cut the trim with a fine blade suited to the material, and deburr every cut before fitting. A burr on a mitred return will hold the joint open. A burr on a butt joint will catch grout and show as a dark line. Dry fit the end detail with the tile in place, and check the joint from normal viewing distance, not from close up alone. A joint that looks tight at arm’s length can still gape when viewed from across the room.
Three mistakes account for most failed ends. The first is ordering caps for the wrong height, which happens when the trim height was never confirmed by test fit.
The second is fixing the end after tiling, when the anchor leg can no longer bed into adhesive. The third is painting a raw cut end to hide it. Paint wears quickly on a touched edge, and it reads as a repair rather than a finish. If a cut end cannot be capped or returned, change the layout so the run dies into a surface instead.
Wet zones deserve one extra check. An end cap or a return in a shower must not trap water behind the profile.
The joint should drain or seal cleanly, and the sealant used must suit constant wetting. In dry zones, the same joint can rely on grout alone, provided the gap is even and fully filled. For the sizing step that prevents wrong height caps, see the guide to choosing the right trim size. For corners, where the same 45 degree skill applies, see the comparison of mitring versus corner pieces.
Ordering checklist for ends
Order ends as line items, not as an afterthought. List each run, its end case, and the method chosen for that end. Add the matching cap part, where a cap is the method, with its profile height and finish written beside it. Add one spare cap per run type, because a lost cap on the last day of tiling can stall handover. Confirm in writing that the caps, corner pieces, and connectors in the order match the profiles in the same order.
When the order arrives, check the ends before tiling starts. Fit one cap to one length, and fold one return on a spare length, while there is still time to reorder. A five minute check at delivery saves a return visit and a mismatched part. It also saves a finished wall with an open metal end that every visitor will notice.
Frequently asked questions
Can I use any end cap on any tile trim?
No. End caps are made for a specific profile shape and height. A cap that does not match will sit proud, gape, or fall off. Confirm the profile and height before ordering caps.
Is a mitred return stronger than an end cap?
A return bedded in adhesive during tiling is strong, because the metal is locked into the tile bed. A cap fixed after tiling relies on its fit and any adhesive used. Neither method should be fixed with glue alone after the tile work is done.
What should I do when no cap exists for my profile?
Change the layout so the run dies into a wall, a frame, or a plinth. Or use a mitred return if the profile shape allows it. Do not leave a raw hollow end open, and do not paint it as a substitute finish.
Should a shower trim end be sealed differently from a dry wall end?
Yes. A shower end must not trap water behind the profile, and its sealant must suit constant wetting. A dry wall end can use grout alone, provided the gap is even and fully filled.
When should end details be decided?
Before tiling starts, at layout stage. The best methods need the trim anchor leg to bed into adhesive, and cap availability must be confirmed at ordering time.


