
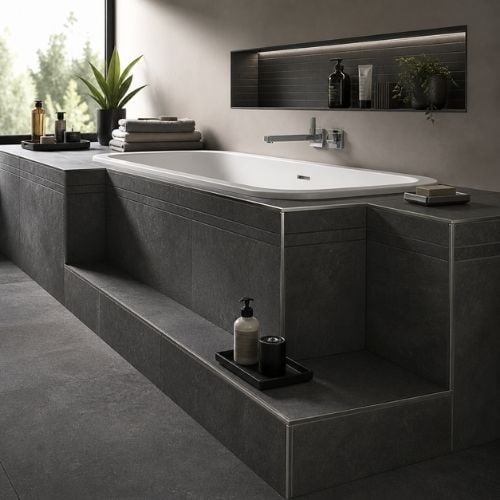
For a bathtub surround and bathroom walls, use metal L-shaped trim at the exposed tile edges and a flexible silicone seal at the tub-to-wall joint. The trim protects the cut edge of the tile, and the seal takes the movement between the tub and the wall. Grout alone cannot do either job for long.
Choose the material by zone. Stainless steel 316 or 304 suits the wettest spots around the tub. Anodized aluminum 6063 or 6463 suits splash zones and dry wall edges. Brass H59 suits a warm metal look where the buyer accepts a higher minimum order. PVC suits dry areas and tight budgets only.
Where the Tub Meets the Wall: The Joint That Fails First
The line where the lowest tile course meets the tub deck is a movement joint. The tub flexes when it fills and when a person steps in, but the wall does not move with it. A rigid fill cracks under that shift, and water then finds the gap behind the tile.
Fill this joint with a flexible silicone sealant made for bathroom use, not grout. The sealant should run the full length of the tub. Check it first when a bathroom shows damp or dark lines near the tub, because this joint fails before the trim does.
Metal trim sits above this joint, not in place of it. An L-shaped profile caps the top edge of the tiled wall above the tub. Its anchoring leg beds in the tile adhesive under the last tile course. The visible face covers the cut edge.
A Zone Map for the Bathroom
One bathroom holds three zones. The wet zone is the wall directly above the tub and the tub deck edge. It takes direct water and steam every day. The splash zone is the wall beside the tub and the wall above a basin. It takes spray and steam, but not a direct stream. The dry zone is the wall far from water.
Match the material to the zone, and confirm the final choice against the tile thickness and a finish sample before you order in bulk.
| Zone | Where it is | Recommended material | Recommended profile |
|---|---|---|---|
| Wet | Wall above the tub, tub deck edge | Stainless steel 304 or 316 | L-shaped edge trim; round nose on the deck edge |
| Splash | Wall beside the tub, wall above the basin | Anodized aluminum 6063 or 6463, or stainless steel 304 | L-shaped edge trim |
| Dry | Upper wall edge, wall by the door | Aluminum 6063, brass H59, or PVC | L-shaped edge trim; flat strip as a border |
| Inside corner | Where two tiled walls meet | Same metal as the nearby edge trim | Inside corner (cove) profile |
The table is a guide, not a test result. Ask for a finish sample and check the color under the bathroom light before you commit.
Which Metal Holds Up in a Wet Bathroom?
Stainless steel is the safe pick for the wet zone. Grade 304 serves most bathrooms well, and grade 316 adds a margin where cleaning products are strong or the water is hard. Both grades keep a clean face with a simple wipe.
Anodized aluminum is lighter and easier to cut on site, and grades 6063 and 6463 are the alloys NIUYUAN supplies for tile trim. It suits splash zones and dry edges, and it also serves wet zones where the buyer prefers a matte black or silver look.
Brass H59 brings a warm gold tone that no steel finish copies. It carries a higher minimum order than aluminum, so confirm the quantity before you specify it across a whole project. Lacquered, chrome-plated, and smoked chrome finishes are available for brass trim.
PVC costs the least and cuts with hand tools, but it scratches more easily than metal. Use it in dry areas or in rental refits, not as the main edge on a tub surround that will be scrubbed daily.
Profiles by Place, Not by Looks Alone
The L-shaped profile does most of the work in a bathroom. It caps the top edge of a tiled wall, the side edge where tile stops, and the edge of a tub surround. Its straight face suits modern tile and large-format porcelain, and it hides the cut edge that a saw leaves behind.
A round nose profile suits edges that hands and feet touch. The tub deck edge is the clear case. A rounded face has no sharp corner to catch a knee or a cloth. It sheds water better than a square face on a horizontal edge.
Inside corners need their own profile. Where two tiled walls meet, a cove profile gives a curved joint that is easy to clean. A sharp grout corner in the same place collects soap and grime. Outside corners are the most exposed edges in the room. The same L profile protects them and keeps the corner line straight.
Ask how corners and end caps are supplied, and whether they match the straight lengths.
How to Size Trim to Your Tile
Trim height must match the tile plus its adhesive bed, since a profile that is too low leaves the tile edge proud and exposed. Measure the tile thickness first, then ask the supplier which profile height fits that tile and what lengths are available.
Do not pick a height from a photo, because photos hide the adhesive bed. The right check is a physical sample set next to a tile with adhesive. The profile face should sit flush with the tile face, or a fraction below it. For help with this step, see this guide on choosing the right trim size.
What to Confirm Before You Order
A bathroom order fails on details, not on the main profile, so run through this list with your supplier before you confirm the order.
- Measure the tile thickness and the adhesive bed, and confirm the profile height against both.
- Mark each zone on the plan as wet, splash, or dry, and assign a material to each zone.
- Confirm the finish and color against a physical sample, kept as the sealed reference.
- Count every corner, end, and joint, and confirm how corners and end caps are supplied.
- Confirm the minimum order quantity for each material: aluminum 1,000 pieces, stainless steel 500 pieces, brass 200 pieces, PVC 2,000 pieces.
- Confirm the sample lead time of 7 days and the bulk lead time of 20–30 working days.
- Ask for the finish sample to be retained for 2 years, so later batches can be matched to it.
- Confirm the tub-to-wall joint will be sealed with silicone on site, not grout.
For background, read what tile trim is and why tile edges need protection. The full range of shapes is covered in the tile trim types guide. For wall panels, see the wall tile trim range. The niche is a different case, covered in the shower niche trim guide.
FAQ
What tile trim should I use around a bathtub?
Use a metal L-shaped trim on the top and side edges above the tub, and seal the tub-to-wall joint with flexible bathroom silicone. Stainless steel 304 or 316 is the safe pick for the wet zone. Do not fill the tub-to-wall joint with grout, because the tub moves and grout cracks.
Can aluminum tile trim be used in a wet bathroom?
Yes, anodized aluminum 6063 or 6463 can be used in a bathroom, and it suits splash zones and dry edges well. For the wettest spots directly above the tub, stainless steel is the safer choice. Confirm the finish against a physical sample before you order in bulk.
What profile finishes the top edge of bathroom wall tiles?
An L-shaped profile is the standard finish for the top edge of bathroom wall tiles. Its anchoring leg beds in the tile adhesive, and its visible face covers the cut edge. A round nose profile is the better pick where the edge is touched often.
How do I match trim height to my tile?
Measure the tile thickness and the adhesive bed, then ask the supplier which profile height fits that tile and check it with a physical sample. The profile face should sit flush with the tile face, or a fraction below it.
What is the minimum order for bath tile trim?
Minimum order quantities are 1,000 pieces for aluminum, 500 pieces for stainless steel, 200 pieces for brass, and 2,000 pieces for PVC. Sample lead time is 7 days, and bulk lead time is 20–30 working days.
Decision
Start with the zone map, not the catalog, and use stainless steel for the wet zone above the tub. Use aluminum for the splash and dry zones, and brass only where the look is worth its higher minimum order. Size the profile to the tile with a sample, and seal the tub joint with silicone. Keep the finish sample as the reference for later batches. That order keeps a bathroom edge looking right after years of daily use.


