
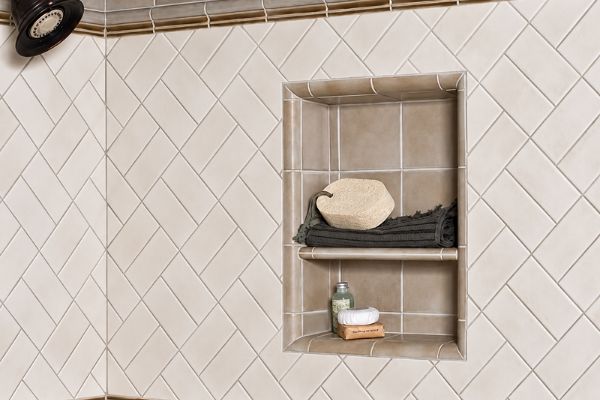
You can finish a tile edge without a metal or PVC profile. Five established ways do the job. They are: matching bullnose pieces, a mitered corner, a polished cut edge, a caulk or grout finish, and a bare edge. Each method works somewhere, and each gives something up: money, installer time, edge strength, or availability. The comparison below scores all five on those terms.
The short answer first. If your tile range offers a matching bullnose, that is usually the simplest trim-free finish. Mitered and polished edges belong on through-body porcelain and natural stone, not glazed ceramic. Caulk and grout finishes suit quiet, low-wear edges only. And on busy outside corners, a profile still earns its place — the last section explains where.
The five methods at a glance
The table below is the whole argument on one screen. Cost is relative, not priced: it compares material and installer time against each other, because rates and tile prices vary by market. Durability means one thing here — how well the exposed edge survives knocks, cleaning, and movement over time.
| Method | How it works | Relative cost | Edge durability | Best for | Watch out for |
|---|---|---|---|---|---|
| Bullnose pieces | Factory-rounded, glazed edge in the same tile | Low–medium: trim pieces cost more per piece than field tile | High: a rounded, fired-on finish | Backsplashes, wall ends, shower walls | Not offered for many ranges; shade can sit slightly off |
| Mitered corner | Two 45-degree cuts meet at a sharp point | High: skilled labor and slow, precise cutting | Low–medium: the thin point chips | Outside corners in porcelain or stone | Needs a precise wet saw; chips are hard to repair |
| Polished cut edge | Cut edge ground smooth with diamond pads | Medium: labor and abrasive pads | Medium–high on through-body material | Exposed edges of porcelain and stone | Shows the tile body on glazed ceramic |
| Caulk or grout finish | A bead of sealant, or grout tooled along the edge | Low: minutes of work, minimal material | Low: no mechanical protection | Tile-to-wall junctions, quiet corners | Sealant needs renewal; unsupported grout can crack |
| Bare edge | The edge left exactly as cut or as fired | None | Low: raw edge, glaze stops at the face | Rustic looks, hidden or low-contact edges | Sharp arris; body color shows on glazed tile |
1. Bullnose: the factory-finished edge
A bullnose piece is a tile with one edge rounded and glazed at the factory. It caps the end of a tiled area in the same material and color as the field tile. Because the finish is fired on, it needs no cutting skill beyond normal setting. Of the five methods, it is the closest thing to a like-for-like replacement for a profile.
The catch is availability. Many ranges — especially large-format and strongly patterned tiles — are sold without any matching bullnose at all. Where a bullnose exists, it may come in limited sizes, and the shade can sit slightly off the field tile. Check that the piece exists for your exact range before you design around it. Our guide to what bullnose tile trim is covers shapes and sizes, and our bullnose vs metal trim comparison weighs it against profiles directly.
It is also the only method here that adds no new material decision: no finish to match, no profile height to pick.
2. Mitered corners: the seamless but fragile option
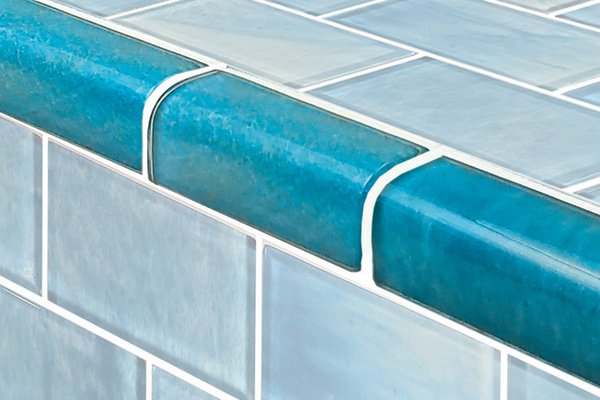
A mitered corner cuts two tiles at 45 degrees so their glazed faces meet at a sharp point. The tile body disappears from view, and the corner reads as one folded surface. It is the finish designers ask for by name on high-end work. It is also the most demanding method here: the cuts need a precise wet saw, dry fitting, and an installer who does them often.
The weakness is built into the geometry. Two thin edges meet at that point, and thin ceramic or porcelain edges chip. A knock from a vacuum cleaner or a dropped bottle can take the point off, and a chipped miter cannot be patched invisibly. The tile around it usually has to come out. Keep miters for through-body material, skilled hands, and corners that will not take daily knocks.
That repair reality, more than the cutting bill, is what should decide the question on any corner that people pass daily.
3. Polished edges: only where the color runs through
Polishing grinds a cut edge smooth with diamond pads, working from coarse to fine. On the right tile, the result looks deliberate: a soft, finished arris with no added material. The right tile means porcelain or natural stone whose color runs through the body. Cut it, polish it, and the edge shows the same material as the face.
Glazed ceramic tile fails this test. Its color sits in a thin glaze layer over a clay body of a different color. Cutting or grinding removes the glaze at the edge and exposes that body as a visible stripe. No amount of polishing brings the face color back. So for glazed ceramic, polishing is off the table; choose bullnose or a profile instead.
Budget the time honestly: each exposed edge is ground and refined by hand, pad grade by pad grade, after the tile is cut.
4. Caulk and grout finishes: cheap, quick, and limited
The cheapest finish adds almost nothing: a neat bead of color-matched caulk where tile meets wall, or grout tooled along the edge. Material cost is close to zero, and the work takes minutes. This is a common way to close the top of a backsplash or the side of a short tile return. It suits edges nobody touches and nobody leans on.
The limits are structural. A bead of caulk or grout adds no mechanical protection, so the tile edge behind it chips as easily as a bare one. Grout is rigid and, left unsupported along an open edge, it can crack and crumble until the joint needs redoing. Caulk stays flexible, but sealant joints are maintenance items and eventually need cutting out and renewing.
In a dry, quiet spot, that trade can be reasonable. The failures start when the same bead is asked to protect a working corner.
5. The bare edge: sometimes honest, often just raw
Leaving the edge bare costs nothing at all. The cut or factory edge is simply left visible, sometimes softened with a rubbing stone. On rustic, handmade-look tiles, that rawness is part of the design. Thick stone and through-body porcelain can also carry it, because the exposed body matches the face.
Everywhere else, a bare edge is a compromise you can see and feel. The arris stays sharp. On glazed tile, the body stripe shows along every cut. Dirt lodges in the porous cut surface of some materials, and the edge has no defense against knocks. Some installers paint the raw edge to blend it with the wall; that hides the stripe, but paint is a cosmetic coat, not protection.
If you choose it, choose it deliberately: specify which edges stay bare before setting starts, not as a leftover decision at the end.
Tile trim vs caulk: two different jobs
Caulk looks like the natural rival to trim because both appear at edges. They do different jobs, though. In tile work, “caulk” properly means a flexible sealant joint. Industry guidelines — TCNA detail EJ171 — treat every change of plane as a movement joint. That covers inside corners, wall-to-floor junctions, and joints against tubs, counters, and frames. Those joints take flexible sealant, never hard grout, because the two sides move differently.
An exposed tile edge is not a movement joint. It is the end of a surface, and its problem is impact and appearance, not movement. A bead of caulk over it seals the gap behind the tile, but it does not cover the edge, straighten it, or protect it. That is why the honest comparison is not trim or caulk. Most good installations use both: profiles where edges are exposed, sealant where planes change.
When a profile is still the right call
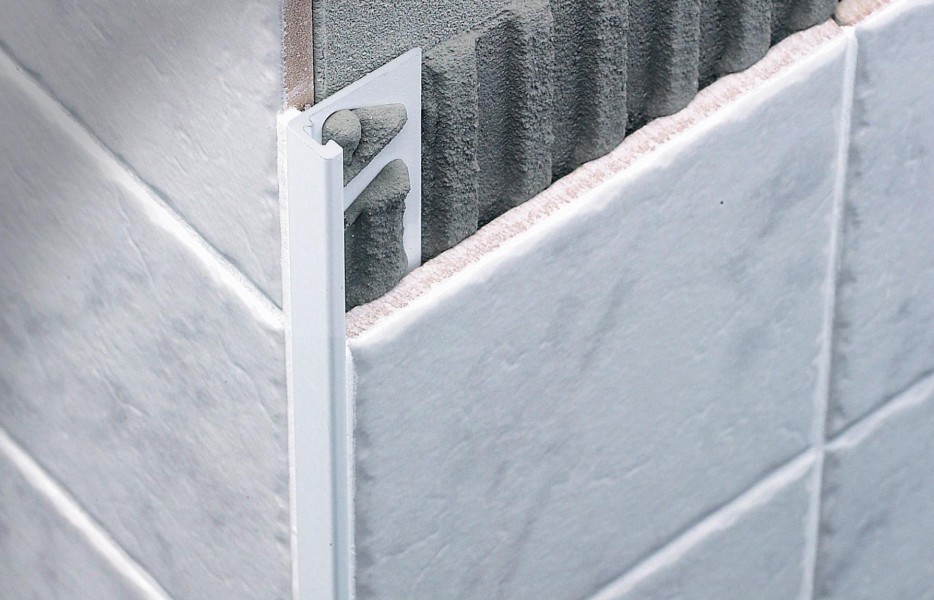
Skipping the profile is a legitimate choice in the cases above. In the cases below, the trim-free methods give up more than they save. If your edge matches one of these, price a profile before you commit to working around it.
- Outside corners in busy rooms. Hallways, kitchen ends, and commercial walls take knocks that chip miters and bare edges. A metal profile exists precisely to absorb them.
- Glazed ceramic with no matching bullnose. Polishing shows the body, miters show the stripe, and bare edges look unfinished. A profile in a matched or deliberate contrast finish — see our colour guide — is the clean exit.
- Shower outside corners and niches. Wet, frequently cleaned, and handled daily; the shower tile edges that survive are rounded bullnose or protected profiles.
- Floors and thresholds. Any edge that takes foot traffic or trolley wheels needs mechanical protection, not a bead of sealant.
Choosing a profile then becomes a sizing and finish exercise, not a design defeat. Our tile trim profiles guide lays out the shapes, and the size guide matches profile height to tile thickness. Get those two decisions right and the edge stops being a problem to hide.
None of the five methods is a mistake in the right place. The mistakes happen when a method is asked to do a job it cannot do. Grout cannot flex, caulk cannot protect, and a miter cannot survive a hallway. Match the method to the edge, and trim becomes a choice rather than a rule.
Frequently asked questions
Can you finish tile edges without trim?
Yes. Bullnose pieces, mitered corners, polished edges, caulk or grout finishes, and bare edges are all in regular use. The right choice depends on your tile body, the edge’s exposure to knocks, and whether your range offers matching trim pieces. The methods fail in predictable places, which the table above sets out.
Can you polish the edge of a glazed ceramic tile?
Not to a matching finish. The color of a glazed tile sits in a surface layer over a differently colored clay body. Polishing a cut edge exposes that body as a stripe. Polishing works on through-body porcelain and natural stone, where the color continues through the material.
Should the joint at a tile edge be caulked or grouted?
It depends on the joint, not the edge. Joints where planes change — inside corners, wall-to-floor, against a tub or counter — are movement joints and take flexible sealant under TCNA EJ171. Joints between tiles on one plane take grout. An exposed outer edge is neither; it needs a finish from the five methods above.
What is the cheapest way to finish a tile edge without trim?
A color-matched caulk bead or a tooled grout edge costs almost nothing in materials and minutes in labor. It is also the least durable option here: it adds no protection, and sealant needs renewing over time. It suits quiet wall edges, such as the top of a backsplash, far better than corners.
When is metal tile trim the better choice?
On outside corners that take knocks, on glazed ceramic with no matching bullnose, in showers, and anywhere an edge meets foot traffic. In those spots the trim-free methods either chip, show the tile body, or need constant renewal. A profile matched to the tile thickness protects the edge permanently.


