
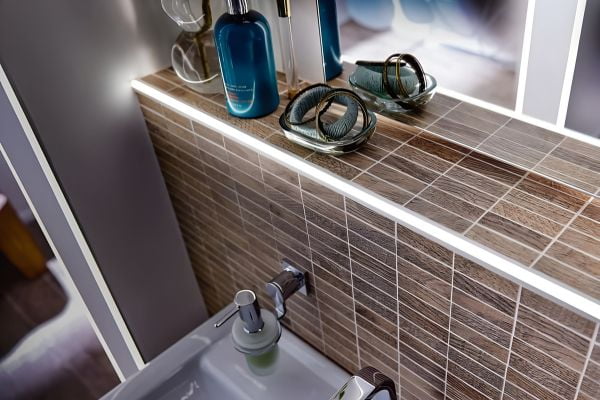
LED tile trim puts a line of light along a tile edge. The aluminum channel sits in the tile bed, the LED strip sits in the channel, and a diffuser snaps over the top. Install it in the right order, and the light line stays straight, even, and easy to service. Install it out of order, and you may need to lift tiles to fix it.
This guide covers the install only: measuring, cutting, bedding the channel, tiling up to it, fitting the strip and diffuser, and wiring the driver. It also lists what to confirm with your supplier before you order. For choosing profile shapes, strip widths, diffusers, and IP ratings, read our LED tile trim buying guide first. The choice of parts shapes the install, so settle the parts before you cut anything.
Before you start: tools and checks
Good installs start before the first cut, so confirm the profile shape, strip width, and diffuser type for each run. Check that the strip fits the channel, because a wider strip will not seat flat and a loose strip will show bright spots. Confirm the driver location and the cable route now, not after the tiles are set.
Keep these tools and parts on site before you begin:
- Tape measure and spirit level
- Fine-tooth saw or hacksaw, plus a file for cut ends
- Notched trowel and thin-set mortar
- Masking tape or a spare diffuser to guard the channel
- Silicone sealant for joints around wet runs
- Low-voltage cable and the driver for the run
- End caps for every open channel end
Dry-fit every run before you mix mortar, laying the channel along its line, marking the cut points, and checking the wire exit. A dry fit takes minutes, and it catches wrong lengths, wrong corners, and missing end caps early.
Step 1: Measure, mark, and cut the channel
Measure the finished run, not the bare wall, and allow for tile thickness, adhesive depth, and any corner piece. Mark the cut line on the channel with a pencil, cut with a fine-tooth saw or a hacksaw, and file the cut end smooth. A rough end can snag the diffuser or leave a visible gap.
Cut the strip to match, but only at its marked cut lines. Never cut between marks, because a strip cut in the wrong place will not light past the cut. Dry-fit the strip in the channel and check the wire exit point, so the wire leaves where the driver cable can reach it. For the cutting method in detail, see our guide to cutting metal tile trim.
Plan the joints, because long runs need straight, tight joints, and a small gap shows as a dark break in the light line. Where two runs meet at a corner, use the matching corner piece or a clean mitre cut. Check the corner fit dry before you bed anything.
Step 2: Bed the channel in thin-set mortar
LED channels fix like other metal trims, with the perforated wing bedding into thin-set mortar and the mortar locking through the holes. Spread mortar with a notched trowel along the channel line, and press the channel into the bed until the wing is fully covered. Check the line with a spirit level as you go.
Set the channel face flush with the planned tile surface, level with the tile, not above it or below it. A high channel catches feet and cleaning tools, while a low channel leaves a shadow gap along the light line. Check the height against a tile offcut before the mortar sets.
Keep mortar out of the channel cavity, because mortar in the cavity blocks the strip and stains the diffuser seat. Push a spare diffuser or a protective insert into the channel while you work, and wipe any splashes off the channel face at once. Dried mortar on the face is hard to clean without scratching the finish.
Step 3: Lay tiles up to the profile
Lay the tiles up to the channel, with the tile edge over the perforated wing. The wing disappears under the tile, and only the light face stays visible. Keep the grout joint beside the channel even, because an uneven joint pulls the eye along the whole run. If you are new to trims, read what tile trim is and what it does before you start.
Do not grout over the channel face, and mask the face before grouting if the grout is dark or coarse. Grout the joints around the channel, then clean the face while the grout is still soft. Let the mortar and grout cure fully before you fit any lights, because damp channels trap moisture behind the diffuser.
Step 4: Fit the LED strip, then the diffuser
Fit the strip only after tiling, grouting, and cleaning are done, because dust and grout damage strips and a stained strip cannot be cleaned. Peel the backing and press the strip firmly into the channel, keeping it straight along the full run. A wavy strip shows as uneven light.
Connect the strip to the cable at the exit point, using the connector the strip supplier rates for the job. In wet areas, seal the joint so water cannot reach the connection. Test the strip before you fit the diffuser, because a dead section is easy to fix now and hard to fix later.
Snap the diffuser into the channel last, pressing it in along the full length and checking that it sits flush at both ends. Fit the end caps on open ends, because end caps keep out dust and water and they finish the run. NIUYUAN channels use an opal or frosted polycarbonate diffuser, with a clear cover on request, and the diffuser softens the diodes into one even line.
Step 5: Wire the driver and test the run
LED strips run on low-voltage DC, usually 12 V or 24 V, and the driver changes mains power to that low voltage. Match the driver output voltage to the strip exactly, because a wrong voltage will damage the strip or leave it dim. Size the driver for the full run length, and leave headroom above the calculated load. One installer guide puts that headroom at 10 to 25 percent above the load.
Put the driver where it can be reached later, in a cabinet, a service panel, or an accessible ceiling void. Drivers need air around them, and they fail sooner in a hot, sealed box. Never bury a driver behind tiles, because a buried driver means breaking tiles when it fails.
Power up and test before handover, checking the full run for even light, dark spots, and flicker. Check every joint and corner, and check that the diffuser sits flush and the end caps are on. Fix any fault now, because a test after handover costs a return visit, and a return visit costs more than the test.
Wet areas, corners, and stairs
Wet areas change two things, sealing and strip choice, so use the sealed end-cap version where water can reach it. NIUYUAN lists IP20 as standard and IP65 with sealed end caps for wet areas. Confirm the strip rating and the cable entry rating as well, because a sealed channel with an open cable entry still lets water in.
Corners need planning, not force, because a strip bends only as far as its maker allows. A sharp bend can break the circuit or lift the strip off its backing. Use a corner connector, or cut the strip at a marked line and join it at the corner. Keep the joint inside the channel, not on the bend.
Stair nosing runs take foot traffic, so check that the profile suits the stair and the channel face sits flush with the tread. A raised edge on a stair is a trip risk. Test the light from standing height, because a stair light that glares at eye level needs a deeper diffuser seat or a different profile. For the shapes that suit each position, see the LED tile trim range.
Installation checklist: check before you move on
Use this table at each stage, and do not move on until the check for that run is done. A missed check at the bedding stage is the most common reason for a second visit. For the wider list of errors to avoid, see our guide to common tile trim installation mistakes.
| Run type | Profile shape | Key check before you proceed |
|---|---|---|
| Wall edge | Flat recessed | Channel face flush with the tile surface |
| Outside corner | L-corner | Corner piece fits dry before bedding |
| Stair edge | Stair-nosing | Face flush with the tread, no raised lip |
| Shower or wet wall | Sealed end-cap version | Cable entry sealed, strip rating confirmed |
| Long straight run | Flat recessed | Joints tight, no dark break in the light line |
Seven mistakes that force a second visit
Most LED trim failures are install errors, not product faults. Each one below is cheap to avoid on the day and costly to fix after handover. Run through the list before you leave the site.
- Fitting the strip before grouting. Grout and dust stain the strip, and the strip cannot be cleaned.
- Cutting the strip between marked lines. The strip will not light past a wrong cut.
- Setting the channel above the tile surface. The raised face catches feet and tools.
- Letting mortar into the channel cavity. The strip will not seat flat.
- Burying the driver behind tiles. A failed driver then means breaking tiles.
- Skipping the test before the diffuser goes on. A dead section is hidden, not fixed.
- Ordering without confirming the supply scope. Find out what the price covers before the order ships.
What to confirm with your supplier before you order
Most install failures trace back to an order, not a tool, so confirm the supply scope first. Ask whether the price covers the channel, the diffuser, end caps, the strip, and the driver, or only some of these parts. NIUYUAN does not publish a fixed supply scope for LED trim, so confirm it for each order. A missing part on site stops the job.
Confirm the numbers that shape the job. NIUYUAN aluminium LED trim carries a 1,000-piece MOQ per profile and finish. Standard samples take 7 days, and custom profiles take 7 to 10 days. Bulk orders take 20 to 30 working days after deposit and drawing approval. Standard channel length is 2.5 metres, with custom lengths on request. Order spares for cuts and corners. NIUYUAN keeps sealed factory samples for two years, so a later batch can be matched against the original.
Ask for the install facts that only the supplier can give. These are the channel internal width, the strip widths it accepts, the diffuser type, and the IP rating with sealed end caps. NIUYUAN channels accept 8, 10, and 12 mm strips at 12 V or 24 V DC.
If any figure is missing from the quote, ask before you pay, because a missing figure is a risk. To pick the right trim size for the tile, use our trim size guide.
Install in order, test before handover, and keep the driver reachable, because that is the whole job. A straight channel, a flat strip, and a tested driver give a light line that stays even. When the next job needs the same result, start from the same checklist and confirm the same facts first. For background on trims, see the ultimate guide to tile trims and why edge trim matters.
Frequently asked questions
Can I fit the LED strip before tiling?
No. Fit the strip only after tiling, grouting, and cleaning are done. Grout dust and splashes stain the strip, and a stained strip cannot be cleaned. Bed the channel, tile up to it, grout, clean, and then fit the strip and diffuser.
How do I cut LED tile trim channel?
Measure the finished run, mark the cut line, and cut with a fine-tooth saw or a hacksaw. File the cut end smooth so it does not snag the diffuser. Cut the LED strip only at its marked cut lines, never between marks.
What voltage driver do I need for LED tile trim?
Match the driver output voltage to the strip exactly, usually 12 V or 24 V DC. NIUYUAN channels accept 8, 10, and 12 mm strips at 12 V or 24 V DC. Size the driver for the full run length with headroom above the load, and ask a qualified electrician to confirm the sizing.
Can LED tile trim go in a shower?
Yes, with the sealed end-cap version. NIUYUAN lists IP20 as standard and IP65 with sealed end caps for wet areas. Confirm the strip rating and the cable entry rating as well, and confirm direct-spray zones with the supplier for each order.
Can I replace the LED strip later without removing the trim?
Yes. The diffuser snaps off and the strip slides out, so a failed strip can be replaced without removing the trim or damaging the tiles. Keep the driver reachable as well, so a driver swap needs no tile work either.


