
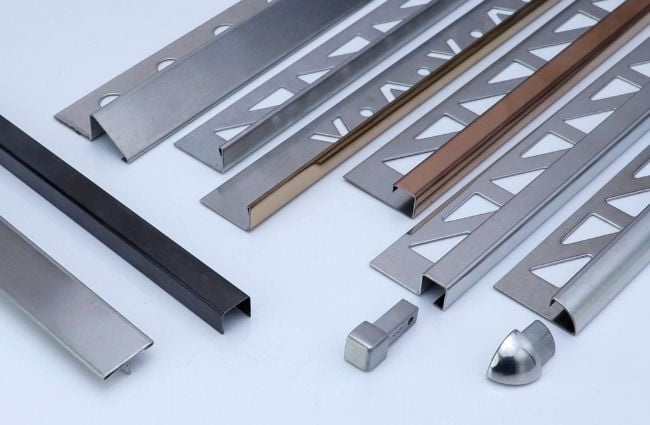
Most bad tile trim edges come from the wrong blade, not from a lack of skill. Aluminum cuts easily but tears when the blade grabs it. Stainless steel resists the cut, builds heat fast, and leaves a hard burr.
Brass sits between the two: soft enough to cut cleanly, yet easy to scratch. Match the blade to the metal, support the profile so it cannot flex, cut slowly, and file every cut end before you fit it. Do those four things and the edge will look factory-finished.
Tool and blade choice by material
The table below gives the safe default for each metal. If you own only one saw, check your material’s row first, then read its section below. A blade rated for another metal may still cut, but it will leave more burr, more heat, or a scratched face.
| Material | Best first choice | Blade or disc | Watch out for |
|---|---|---|---|
| Aluminum | Hacksaw with a mitre box, or a mitre saw | Bi-metal hacksaw blade, highest TPI available; or a carbide-tipped non-ferrous blade | Grabbing and tearing if the profile is not clamped; soft face scratches easily |
| Stainless steel | Variable-speed angle grinder, or a band saw | Thin cutting disc rated for stainless steel, used at the lowest speed; or a metal-cutting band saw blade | Heat that blues the finish; a hard burr if the cut is forced |
| Brass | Hacksaw with a mitre box, or a mitre saw | Bi-metal hacksaw blade, highest TPI available; or a non-ferrous blade | Scratches and dents on the visible face; soft metal marks fast |
One rule applies to all three metals: file the burr off every cut end before fitting, because no blade leaves a truly finished edge. The deburring steps near the end of this guide take only a minute per cut. They are what separate a neat job from a sharp, ragged one.
Cutting aluminum tile trim
Aluminum is the easiest of the three metals to cut, and that ease is also the trap. Clamp the trim to the saw fence or the bench before every cut, and let the blade reach full speed before it touches the metal. Then feed it slowly and steadily, with light, even pressure.
For a handful of cuts, a hacksaw and a mitre box are enough. Choose a bi-metal blade with the highest teeth per inch (TPI) you can find. Fine teeth take smaller bites, so the cut stays smooth and the profile stays put. Use long, even strokes and let the weight of the saw do the work. Forcing the stroke bends thin trim out of shape.
For repeated or angled cuts, a mitre saw is faster and more accurate. Fit a carbide-tipped blade made for non-ferrous metals. Guides for aluminum cutting point to a high tooth count: roughly 80 to 120 teeth on a 10-inch blade. The tooth shape is a triple-chip grind (TCG). That shape shears soft metal cleanly instead of tearing it. A low tooth count wood blade can grab the profile, so it is a poor choice even for a few cuts.
An angle grinder can cut aluminum, but keep it at the lowest speed and use a wheel rated for the job. Abrasive discs can clog on soft aluminum, and the heat can discolor the surface. For most tile trim work, the hacksaw or mitre saw gives a cleaner result. Protect the visible face throughout: tape it or keep it face-down on a soft surface while you mark and cut.
Cutting stainless steel tile trim
Stainless steel is the hardest metal in this guide to cut well. It work-hardens under a dull or forced blade, which makes the cut even harder as you go. It also holds heat, and that heat can blue the finish near the cut. The answer is the right disc, a slow feed, and full support under the profile.
The simplest reliable method is a variable-speed angle grinder fitted with a thin cutting disc rated for stainless steel, run at its lowest speed. Thin discs, around 1 mm thick, remove less metal and generate less heat than thick ones. That matters on thin tile trim, where excess heat warps the profile and stains the finish. A band saw with a metal-cutting blade is the other proven option, and it suits longer straight cuts.
Support the profile along its full length before you start, because an unsupported end will vibrate and leave a wavy cut and a heavy burr. Mark the cut line on the anchoring leg, not on the finished face. A mark on the face is hard to remove from brushed or polished stainless steel. A slip of the marker can ruin a visible length.
Cut in one steady pass with light pressure, and do not push the disc through the metal. Let the abrasive do the work, and pause if the edge starts to change color. Blue or straw discoloration near the cut means the metal got too hot.
A slower feed and a fresh disc prevent most of this heat damage, and after the cut, expect a hard burr. Stainless burrs are tougher than aluminum ones, so file them off instead of snapping or peeling them.
Cutting brass tile trim
Brass cuts much like aluminum, so the same tools work. A hacksaw with a bi-metal blade at the highest TPI available handles short runs and single cuts. A mitre saw or chop saw with a non-ferrous blade handles repeated cuts and mitres. In both cases, the main risk is not the cut itself but damage to the face.
Brass is softer than steel and marks fast. A clamp jaw, a saw fence, or a dropped tool can dent the visible surface. Keep the protective film on the face while you cut, if the trim still has it. Where there is no film, lay the profile face-down on a clean, soft surface and pad the clamp jaws. Check the jaws for grit first: one trapped chip can score a whole length.
Feed the cut at a moderate, even pace. Brass does not need the slow, careful pace that stainless steel demands, but rushing still leaves a ragged edge and a larger burr. After cutting, file the burr off the cut end, just as you would for aluminum. Brass files cleanly, and a few light strokes with a mill file usually leave a smooth, safe edge.
One more caution applies to brass trims with a lacquered or coated finish. A file or sandpaper that slips onto the face can break the coating near the cut. Work only on the cut edge itself, and keep abrasives away from the finished surface. If the coating chips at the very end, hide that end in a joint or under a corner piece. Do not leave it in the middle of a visible run.
Measuring, marking, and mitre cuts
Measure each run on its own wall. Walls are rarely as straight as the drawing suggests, so a length copied from the opposite wall often ends up short. Cut one piece, test-fit it, and only then measure the next. Cutting every length in advance saves little time and wastes trim when a wall runs out of square.
Mark the cut line on the anchoring leg, the part that beds into adhesive and stays hidden. Marking the finished face risks a visible line that survives cleaning. For a mitre, settle the corner method before you cut: a mitred corner consumes length differently from a corner piece. Decide first, measure second, and the joint will close without a gap.
Cut mitres with the profile clamped at the exact angle, and test the joint dry before bedding anything in adhesive. A small gap at a mitre looks far worse once grout frames it. If the two faces do not meet cleanly, a few careful file strokes on the longer side usually close the gap. Do not force a mitre closed by bending the profile; the bend will show as a kink in the finished edge.
Deburring and edge finishing
Every cut leaves a burr, a thin raised ridge of metal along the cut edge. It is sharp enough to cut skin, and it stops the trim from sitting flush against tile or a corner piece. Removing it is not optional. It is the last step of every cut, and it takes about a minute per end.
Start with a mill file or a swivel-head deburring tool. Use light, controlled strokes along the cut edge, working away from the finished face. Keep the file flat against the edge. Tilting it rounds over the corner of the profile and softens the crisp line the trim is meant to give. On stainless steel, expect more resistance and take more strokes. On aluminum and brass, a few passes usually suffice.
For a smoother finish, follow the file with fine sandpaper, in the 220 to 320 grit range, wrapped around a block. The block keeps the surface flat and stops your fingers from rounding the edge. Work only on the cut end, not on the face. Finish by brushing away all metal dust. Loose chips left on the trim can scratch the face during fitting, and dust trapped under adhesive can stain grout lines later.
On stainless steel, a fine-grit flap disc can also dress the cut edge and blend it toward a brushed finish. Use it lightly: heavy pressure on one spot will polish a visible patch into a brushed surface. For most tile trim, the file-and-sandpaper route is simpler and easier to control.
Safety points
Cut metal throws sharp chips and, with power tools, hot sparks. Eye protection is mandatory for every method in this guide, including sawing, and a face shield adds protection when cutting aluminum on a mitre saw. Gloves protect your hands while handling cut lengths, but keep them clear of a spinning blade or disc.
Clamp the work for every cut, power or hand, because a free hand holding trim near a blade is how most cutting injuries happen. Keep the cutting area clear of offcuts, and never reach across a spinning blade to clear one. Unplug or lock out the tool before changing a blade or disc, and check that the disc rating matches the tool speed before fitting it.
Cut in a ventilated space when grinding stainless steel. Grinding dust and fumes should not be breathed in, so wear a dust mask for longer grinding sessions. Sweep up metal chips before they reach finished floors or tile.
Common mistakes
The same few errors account for most ruined lengths. A wood blade on a mitre saw grabs aluminum and kicks it back. A forced cut on stainless steel blues the finish and leaves a burr that is hard to file off. An unclamped profile chatters and tears, whatever the metal. Marking the finished face leaves a line that cleaning may not remove.
Skipping deburring is the most common shortcut. It shows twice: once as a sharp edge that catches fingers, and again as a trim length that will not sit flush. Rushing the feed rate is the second. A slow, steady feed gives a cleaner cut on every metal in this guide, and it costs only seconds per cut. Finally, cutting all lengths before test-fitting wastes trim on walls that are not square. Measure, cut, fit, and repeat.
Related reading before you start cutting: installation steps, mitre joints vs corner pieces, trim sizing, stainless grades, and brass selection. For materials, see aluminum alloys, aluminum installation, trim accessories, stainless U profiles, and brass L profiles.
Frequently asked questions
Can I cut metal tile trim with a hacksaw?
Yes, for aluminum and brass a hacksaw is often the best choice for a few cuts. Use a bi-metal blade with the highest TPI available and a mitre box for straight or angled cuts. Stainless steel is harder work by hand, so a grinder or band saw suits it better.
What blade do I need to cut aluminum tile trim on a mitre saw?
Use a carbide-tipped blade made for non-ferrous metals, with a high tooth count and a triple-chip grind. Guides point to roughly 80 to 120 teeth on a 10-inch blade. A wood blade can grab the profile and tear the cut.
How do I cut stainless steel tile trim without ruining the finish?
Use a thin disc rated for stainless steel on a variable-speed grinder at its lowest speed. Support the profile fully, feed slowly, and keep the protective film on the face. Heat from a forced cut is what blues the finish.
Do I need to deburr tile trim after cutting?
Yes, every cut leaves a sharp burr. File it off with a mill file or a deburring tool, then smooth the end with fine sandpaper if needed. A burr left in place can cut skin and stop the trim from sitting flush.
Why does my aluminum trim tear instead of cutting cleanly?
Usually the profile was not clamped, the blade had too few teeth, or the feed was too fast. Clamp firmly, use a fine-tooth non-ferrous blade, and feed slowly with light pressure. A dull blade tears as well, so change it before it drags.


