
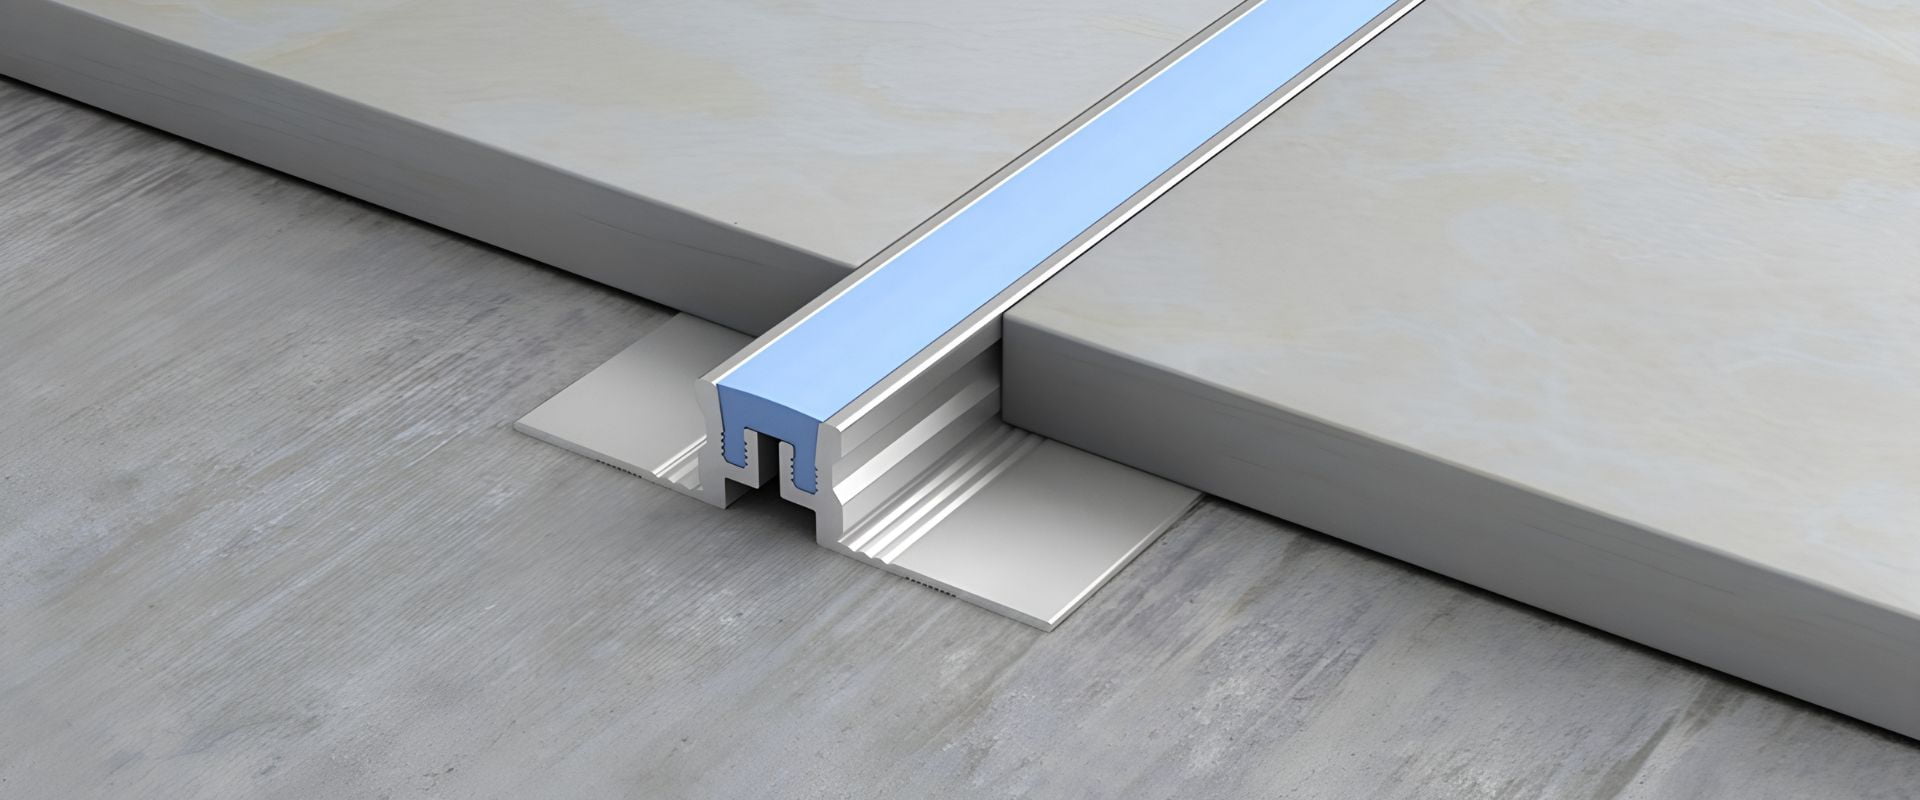
Large tile floors need planned gaps, not just neat grout lines. Under TCNA EJ171, interior floors get a field joint at most every 25 feet in each direction. Exterior floors need one every 8 to 12 feet, while BS 5385-3:2024 calls for intermediate joints every 3 to 5 metres outdoors. In both systems, the design professional sets the final layout. This guide explains when joints are mandatory, how spacing is set, and what to check on site.
What a Movement Joint Does
A movement joint is a planned gap that lets a tile floor move without cracking. Tiles, adhesive, screed, and concrete do not expand at the same rate. Heat, moisture, drying shrinkage, and settlement all push or pull the floor in small amounts. Without a gap, that stress shows up as cracked tiles, cracked grout, or lifted corners. A joint breaks one large floor into smaller fields that move on their own.
The joint must stay flexible for the life of the floor. Grout is rigid, so a grout-filled gap is not a movement joint. A real joint uses a flexible sealant, a preformed profile with a flexible zone, or both. The gap must run clean through the tile layer and, where required, through the screed or slab below. A joint that stops halfway, or is bridged by rigid adhesive, cannot do its job.
When a Joint Is Mandatory
Perimeter joints come first and apply to every tiled floor, and EJ171 requires a movement joint wherever tile meets a restraining surface. That includes perimeter walls, columns, curbs, pipes, and any change in backing material. It also includes junctions with a different floor finish. The only stated exception in the EJ171 summary is at drain strainers.
Field joints divide the open floor into bays once a floor run exceeds the spacing limit for its setting. Structural joints form a third case, and they are non-negotiable. Where the building slab or structure already has a joint, the tile joint must sit directly over it and run through the full assembly. A tile joint offset from the structural joint below it leaves the tile layer spanning a moving crack.
- Perimeter joints: at every wall, column, curb, pipe, and restraining edge.
- Field joints: across open floors, at the spacing limits set out below.
- Structural joints: directly over every joint in the slab or structure.
- Change-of-plane joints: at inside corners and where the floor meets a wall.
- Material-change joints: where tile meets another finish or a different substrate.
TCNA EJ171 Spacing Rules
EJ171 is the movement joint method in the TCNA Handbook for ceramic, glass, and stone tile. It sets maximum spacing, not one fixed distance for every job. The design professional may call for closer joints where materials, exposure, or substrate demand them. The table below gives the headline limits from current EJ171 summaries.
| Setting | Maximum field spacing | Notes |
|---|---|---|
| Interior, sheltered | 25 ft (about 7.6 m) in each direction | Use the tighter limit if any trigger below applies. |
| Exterior | 8 to 12 ft (about 2.4 to 3.7 m) in each direction | Closer spacing for large temperature swings. |
| Interior in direct sun or moisture | 12 ft (about 3.7 m) in each direction | Sunrooms, glazed walls, and wet areas count here. |
| Above-ground concrete slab | 12 ft (about 3.7 m) in each direction | Slab movement is greater than on-grade work. |
| Perimeter and restraining edges | At every edge, regardless of floor size | Small rooms still need perimeter joints. |
Two points often cause errors on site: first, spacing applies in each direction, so a long narrow floor needs joints across its length and width. Second, the sun and moisture limit overrides the sheltered interior limit, so a bright atrium floor is not sheltered, even indoors. Where two limits could apply, the tighter one governs.
EJ171 places responsibility clearly: because tile goes over many structural systems, the design professional or engineer must show joint locations and details on the drawings. Installers should not invent a layout on the day, and if no drawing shows joints, close that gap before tiling starts.
BS 5385-3:2024 Framework
BS 5385-3 is the British code of practice for floor tiling, and its 2024 edition tightened the external message. For external tile work, intermediate joints should sit every 3 to 5 metres within the tile assembly. That range is shorter than older field guidance many installers still quote. The designer must reduce spacing further where exposure, substrate movement, tile size, or dark colour raise stress.
For internal floors, BS 5385 works by field division rather than by one universal number. Floors are split into bays by perimeter, intermediate, and connecting joints, which sit where tiling meets steps, doors, or frames. Suspended floors need smaller fields and extra joints over supports, and as with EJ171, the designer assesses stress and fixes locations.
The two systems agree on method and differ on numbers. EJ171 gives explicit maximum spacing by setting, while BS 5385-3:2024 gives a clear external range and a field-division method for the rest. A project that cites both should state which system governs. Do not mix an EJ171 spacing with a BS 5385 width rule unchecked. Where a local code sets its own limit, that document wins.
Setting Spacing on a Real Floor
Start from the governing system, then divide each run by its limit. Take a sheltered interior hall of 30 metres by 18 metres under EJ171. The limit is about 7.6 metres, so the 30-metre run needs four bays and the 18-metre run needs three bays. That gives twelve fields, so adjust bay edges to the nearest grout line without exceeding the limit.
Now take an external terrace of 20 metres by 12 metres under BS 5385-3:2024. At a 4-metre intermediate spacing, the long run needs five bays and the short run needs three bays. Dark tiles, full sun, or a flexible substrate would push spacing toward the 3-metre end. The same logic applies to heated floors and balconies.
| Worked example | Governing limit | Resulting bays |
|---|---|---|
| Interior hall, 30 m by 18 m | EJ171, about 7.6 m | 4 by 3 bays, 12 fields |
| External terrace, 20 m by 12 m | BS 5385-3:2024, 4 m chosen | 5 by 3 bays, 15 fields |
| Small bathroom, 3 m by 2 m | Perimeter joints only | 1 field, joints at all edges |
Keep field shapes close to square where the layout allows, because long thin fields concentrate stress at their ends. Where a door, column, or drain breaks a bay, add a joint at that break. Every re-entrant corner, where a wall steps in or out, is a stress point and deserves a joint.
Joint Width and Profile Choice
Spacing sets where joints go, while width sets how much movement each joint can absorb. EJ171 minimum widths rise with spacing outdoors: an exterior joint at 8 feet on centre needs at least 3/8 inch. One at 12 feet needs at least 1/2 inch, because wider spacing means more movement per joint.
Interior perimeter joints at walls need at least 1/4 inch. Other interior perimeter joints should reach 1/4 inch where possible, never less than 1/8 inch. Change-of-plane joints follow the same rule: match the grout joint, but never go below 1/8 inch.
Under BS 5385, required width depends on floor size, screed system, and tile type. No single width fits every floor, and one industry summary notes that a joint infill should absorb about 20 percent of the joint width. That rule explains why a narrow joint cannot serve a wide bay. If expected movement exceeds that capacity, the joint must be wider or the bays smaller, and the designer fixes the required width.
Two build types cover most floors. A sealant joint uses a compressible backer rod with an ASTM C920 sealant, such as silicone, urethane, or polysulfide. It is tooled slightly below the tile surface, while a preformed profile uses metal or PVC anchoring legs with a flexible centre zone. That zone also protects tile edges from traffic.
Market examples show the range. Surface profiles with flexible zones around 5 to 11 millimetres suit light and medium floors. Heavy-duty profiles with wider zones suit warehouses and malls. Profile height must match tile thickness, following the tile trim size guide.
Coordinating Joints With Edge Trim
Movement joints and edge trim meet at perimeters, transitions, and doorways, so plan them together. A perimeter joint hidden under a cove base or trim still needs its full width behind that cover. Trim bonded rigidly across a joint defeats the joint. Where trim crosses a joint line, the joint must continue through the trim zone or the trim must stop.
At transitions to another finish, the joint profile and the edge trim share one detail. The profile protects the tile edge, the flexible zone absorbs movement, and the trim finishes the adjoining floor edge. For background, see the tile expansion joints guide and the tile trim accessories guide. For corner details, see the mitring versus corner pieces guide.
Installation order matters as much as product choice, so set the joint line first, then cut tiles and trim to it. Do not tile across the line and cut later. Keep the joint clean to its full depth, and do not let adhesive or grout fill it during tiling. NIUYUAN profile sizes and finishes for the tile expansion joint range need confirmation at specification stage. Confirm the profile against tile thickness and joint width before ordering.
Site Checklist Before Tiling Starts
| Check | Pass mark |
|---|---|
| Joint drawing | Locations and details shown on project drawings. |
| Governing system | EJ171 or BS 5385 stated, with edition noted. |
| Perimeter joints | Present at every wall, column, and restraining edge. |
| Structural alignment | Tile joints sit directly over slab joints. |
| Field spacing | No bay exceeds the limit in either direction. |
| Joint width | Meets the minimum for its spacing and setting. |
| Sealant or profile | Flexible system specified, not grout alone. |
| Trim coordination | No trim bridges a joint line. |
| Clean joint | Gap is clear to full depth before sealing. |
Run the same checklist again after tiling, before sealant goes in. Check that no joint was grouted by mistake, and that profiles sit flush with or just below the tile surface. Check that no perimeter joint was filled with rigid adhesive. A blocked joint found now can still be cut out and remade. The same defect after handover means cutting a finished floor.
Common Mistakes That Cause Cracks
The most common mistake is filling movement joints with grout, which looks tidy on handover day, then cracks as the floor moves. The second mistake is skipping perimeter joints in small rooms, even though small floors still meet walls, columns, and pipes, where stress concentrates. The third mistake is offsetting a tile joint from the slab joint below it.
- Never grout a movement joint, and never bridge it with rigid trim.
- Never omit perimeter joints, even in small rooms or short runs.
- Never offset a tile joint from the structural joint beneath it.
- Never let adhesive, grout, or debris fill a joint before sealing.
- Never copy spacing from another project without checking its setting.
Related Reading
If this plan is for a specification, start with the tile expansion joints guide for when joints are required. Then return here for spacing and widths. For fitting detail, see how to install tile trim and how to cut metal tile trim. Get the joint plan onto the drawings before tiling, not after cracks appear.
Frequently Asked Questions
Do small tile floors need movement joints?
Yes, small floors still need perimeter joints at every wall, column, and restraining edge. Field joints only become mandatory once a run exceeds the spacing limit. A bathroom floor may have one field and still need joints at all four edges.
What spacing does EJ171 require indoors?
For sheltered interior floors, EJ171 sets a maximum of 25 feet in each direction. That limit drops to 12 feet where tile faces direct sunlight or moisture. The same 12-foot limit applies over above-ground concrete slabs. These are maximum values, so a designer may specify closer joints. Always check the project drawings first.
What spacing does BS 5385 require outdoors?
BS 5385-3:2024 advises intermediate joints every 3 to 5 metres for external tile work. Spacing should move toward the shorter end where sun, heat, dark tiles, or substrate movement raise stress. For internal floors, BS 5385 uses field division into bays rather than one universal number. The project specification must state the internal layout.
Can grout fill a movement joint?
No, grout is rigid and cannot absorb floor movement, so a grout-filled gap is not a movement joint. A real joint needs a flexible sealant meeting ASTM C920, a preformed profile with a flexible zone, or both. The gap must stay clean to its full depth, and if a joint was grouted by mistake, cut it out and remake it.
Who decides the final joint layout?
The design professional or engineer decides, and the layout must appear on the project drawings. EJ171 states this duty expressly, because tile covers so many structural systems. Buyers and importers should ask for that drawing before ordering tile, trim, or profiles.


